This game report is from my ongoing WW1 Palestine campaign turn 3. The setup steps for this game can be found on the previous post.
Background
Having successfully pushed Turkish forces out of the Sinai the Egyptian Expeditionary Force (EEF) paused for three months to extend their supply infrastructure and prepare for the move into Palestine. Air reconnaissance confirmed that the Turks had not been idle and that they had developed defensive positions along the Gaza to Beersheba line. In December 1916 EEF Headquarters plan for an attack around the Gaza end of the defensive line on two fortified positions.
 |
| Reconnaissance Flight |
The plan
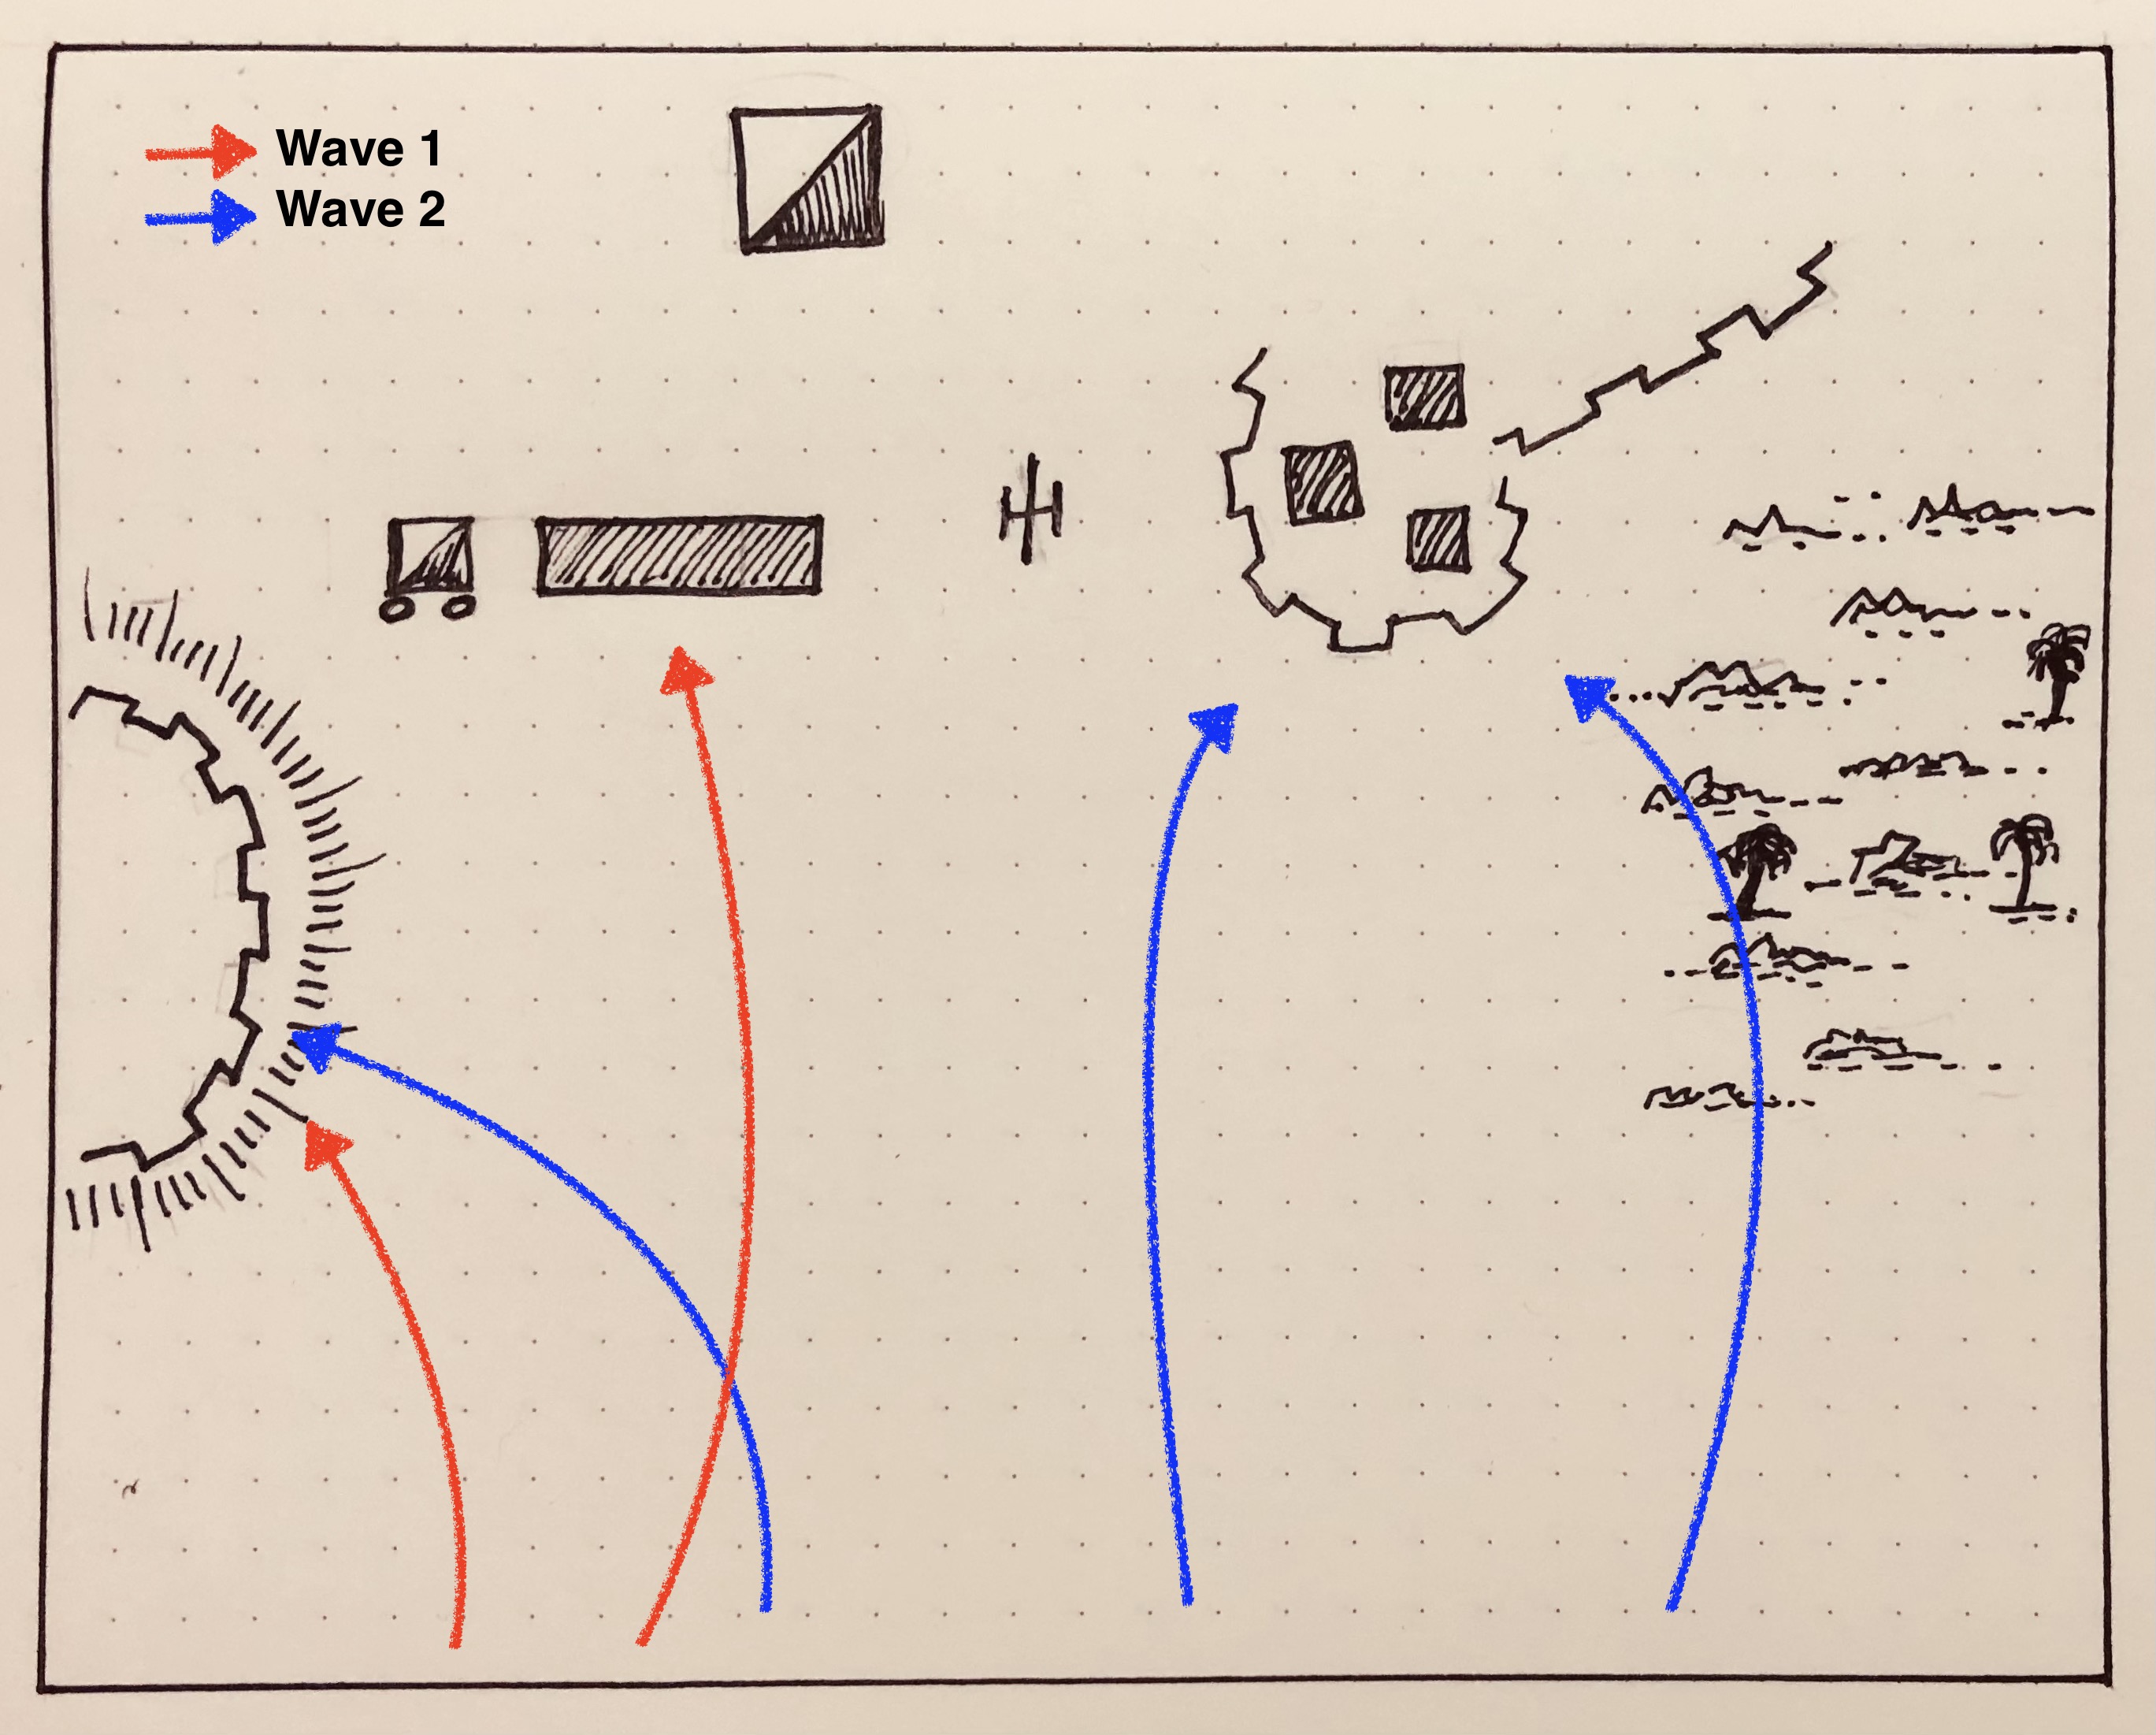
The attack would be delivered in two waves. The first attacking wave, supported by an early morning barrage, would be directed at the redoubt and to remove the threat of a counter attack posed by Turkish troops between the redoubt and town. The second attacking wave would then consolidate and hold the redoubt and assault the fortified town. Taking both objectives are required to breach the defensive line and for victory.
 |
| A sketch of the tabletop with the planned wave 1 moves in red and wave 2 in blue. |
Each EEF Wave would consist of:
- 5 x Infantry units (2 with supporting machine guns)
- 1 x Artillery unit
The first wave will retire in good order before the second wave advanced. (This follows the approach of the selected One-Hour Wargames Scenario - "Fortified Defence").
The Turkish forces defending this region of the Gaza-Beersheba line consist of:
- 4 x Infantry units (one of which can benefit from being dug in)
- 1 x Cavalry unit
- 1 x Artillery unit
- 1 x Armoured Car (added with campaign chance event)
Aircraft from both sides are operating in the area (game chance cards are in use) and will strafe enemy units in the open.
Wave 1
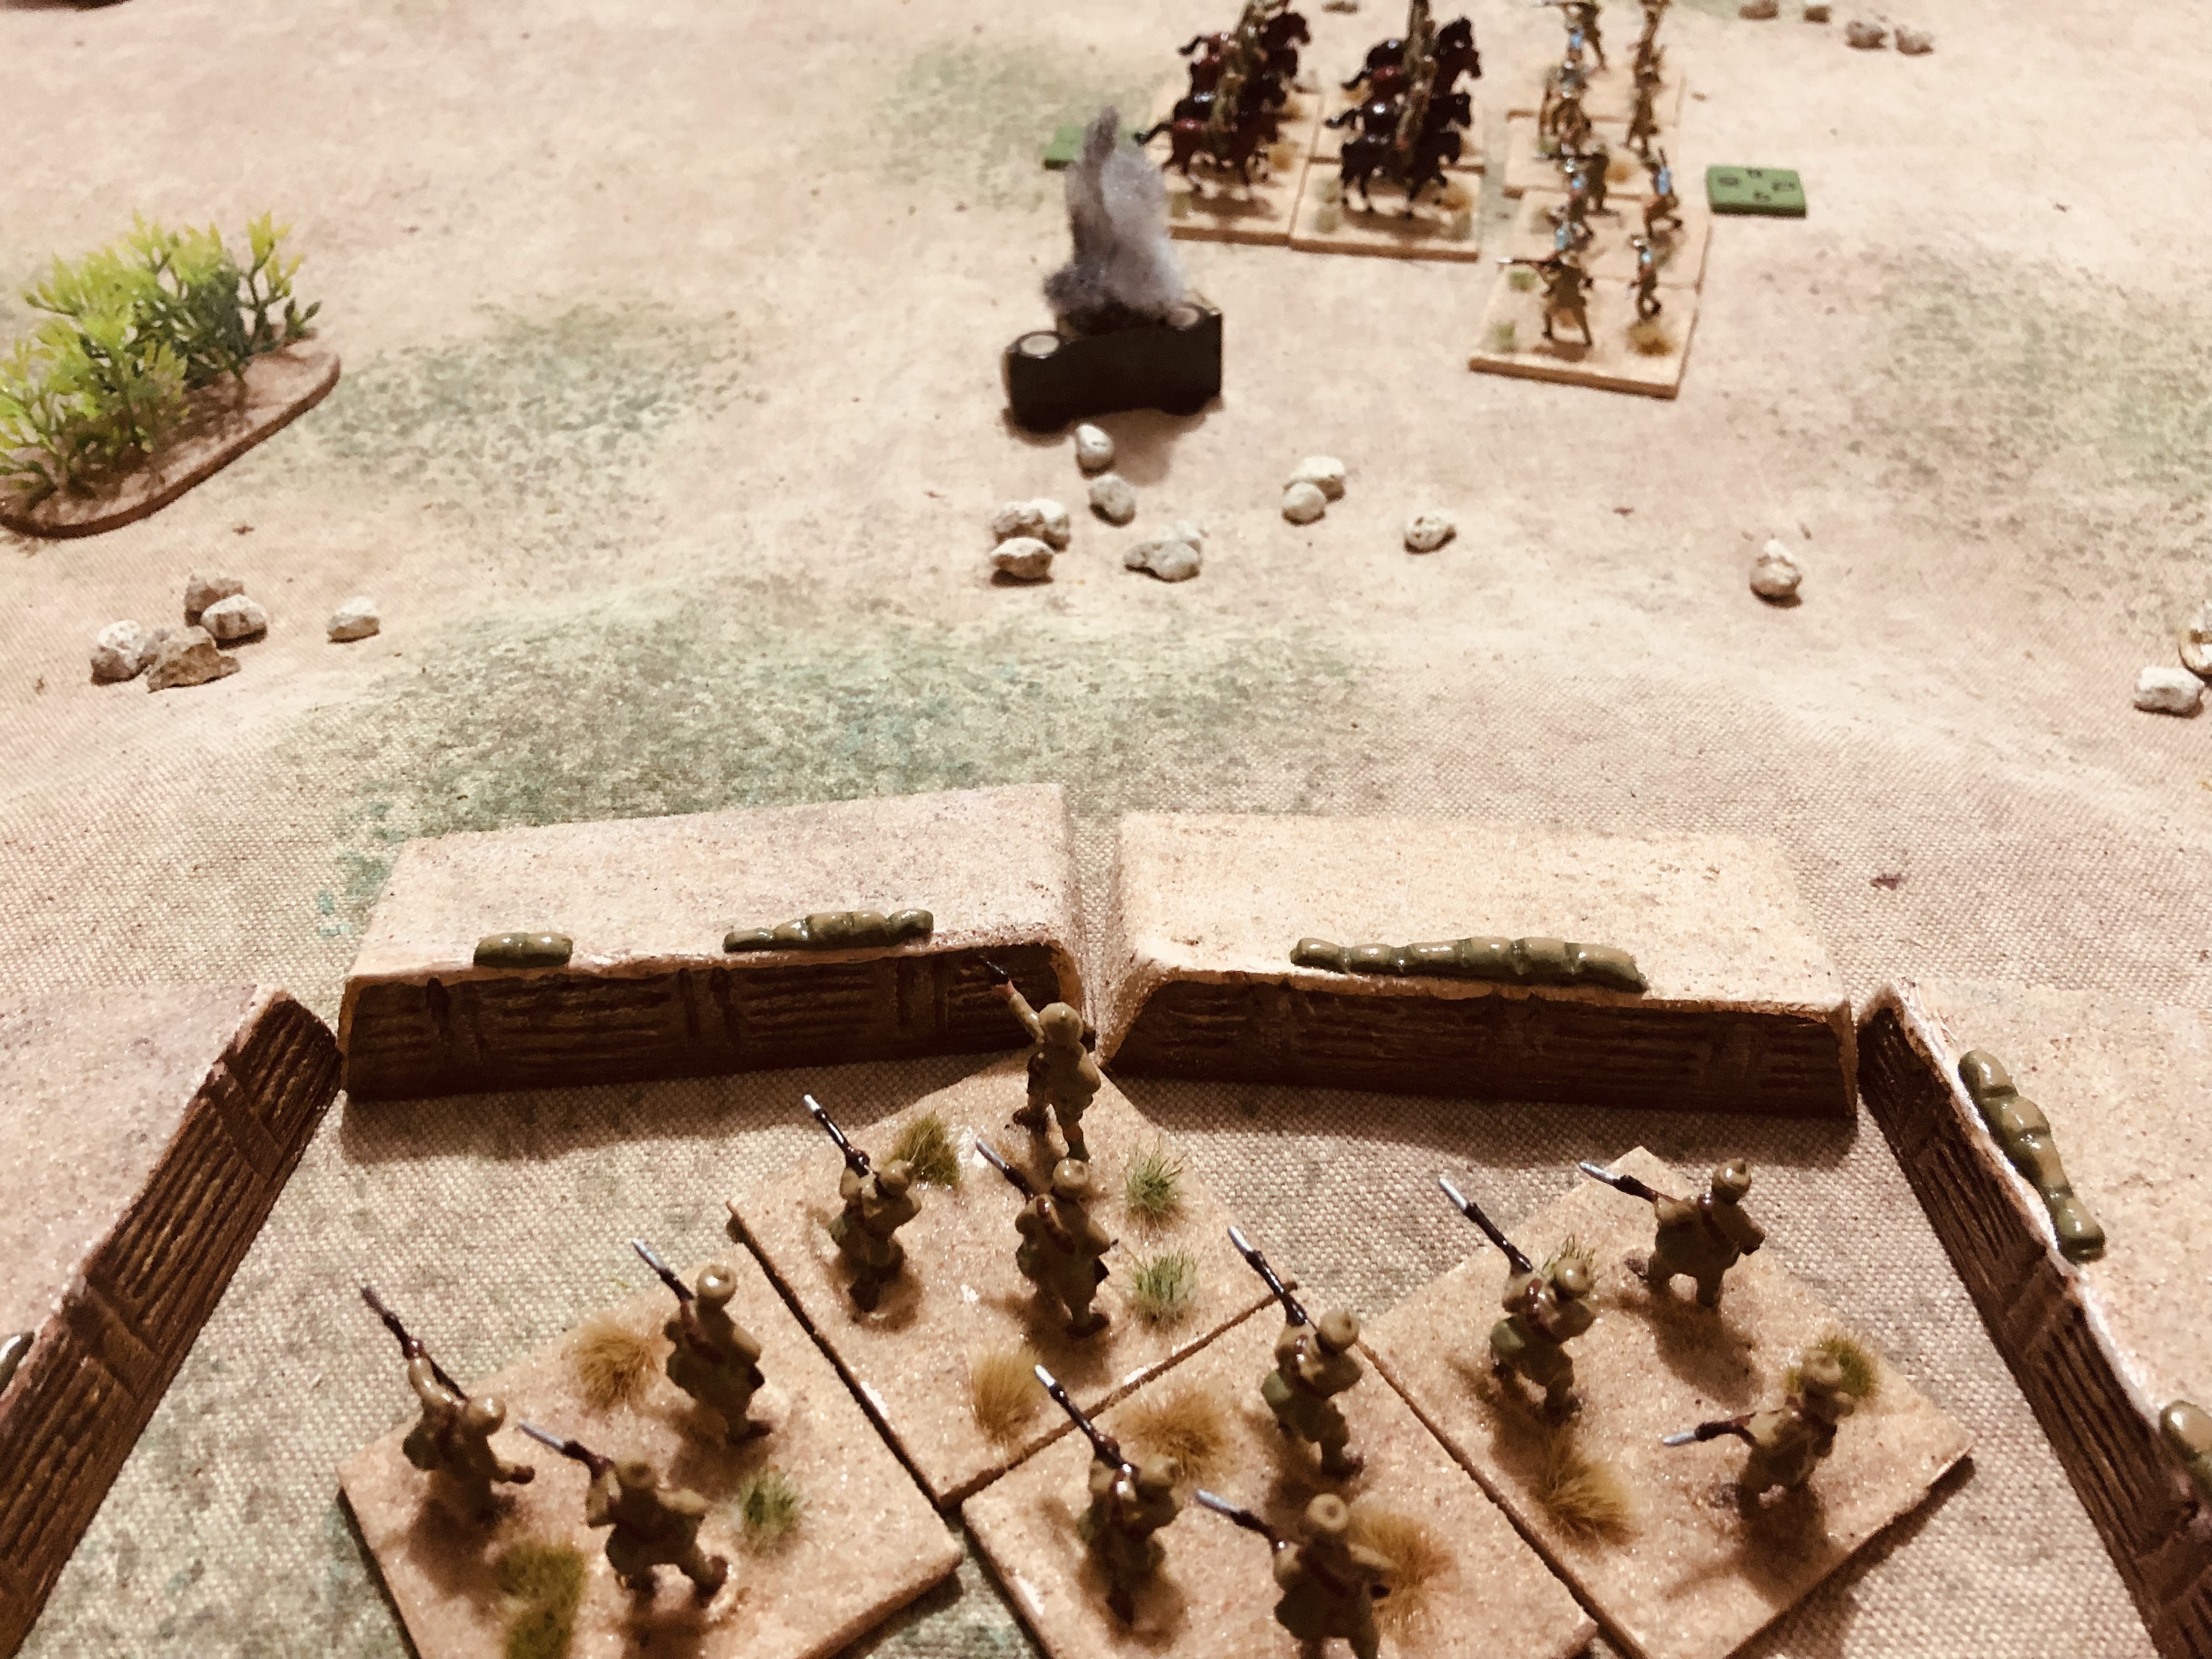
Following the initial barrage wave 1 advanced on the first objective, the redoubt, which has laying down very effective fire and providing stubborn resistance. Additional EEF units joined the assault and the redoubt finally succumbed. A late counterattack by Turkish infantry supported by an armoured car was repulsed before the first wave retired at noon before the second wave began their advance.
 |
| Wave 1 begins its assault on the redoubt. |
 |
The redoubt is taken and Turkish infantry counter attack.
|
 |
| The redoubt safely in EEF hands. |
Wave 2
As the second EEF wave advance Turkish aircraft appear, strafing and bombing the advancing infantry. Momentum in the centre was slowed as Turkish artillery added to the disarray caused by the air attack. On the wings EEF infantry successfully advanced to occupy the Redoubt and attack the fortified town from an area of broken ground.
In the centre an artillery duel commences while the infantry try to make up for lost time, but they were delayed further as Turkish cavalry posed a threat. Finally, the Turkish artillery are suppressed, but not before evening descends and time runs out for the EEF to take the fortified town.
 |
Wave 2 readies for its advance.
|
 |
The advance is hindered by Turkish aircraft sorties.
|
 |
| Turkish cavalry present a threat in the centre. |
 |
| EEF fail to take the fortified town. |
Summary
A Turkish victory! This was always going to be a tough ask for the EEF, taking two fortified positions. Wave 2 progress suffered from not suppressing the Turkish artillery during Wave 1. In addition some very timely Turkish air sorties created stumbling blocks for the advancing infantry.
 |
| EEF infantry holding the redoubt, the only objective taken. |


Cracking stuff again there Peter. I loved the hand drawn map as always and nice to see the plan of attack in advance.
ReplyDeleteI find drawing a map with the moves helps me to adhere to my initial plans and orders.
DeleteI am with Steve! Great stuff! Your situation mirrors the tactical situation I face in Tuesday's RCW game. As Red CiC, I am tasked with taking two, heavily defended blockhouses. Hope I have more success than your BEF!
DeleteGood luck with your game. I trust you have a better outcome than I did.
DeleteIt's the setbacks that make the campaign narrative interesting. I like the whole concept, the execution, and the look, of this campaign!
ReplyDeleteCheers,
Ion
I agree, the ups and downs certainly do make the campaign. Regards, Peter
DeleteAnother engaging battle report…many thanks for posting👍🏼. Did the randomly allocated dug in Turkish unit have a significant effect on the attackers?
ReplyDeleteThey made no difference in the end, and they were not engaged in the battle.
DeleteGreat report Peter. As you say a difficult battle to win for the EEF. Better luck next time :-)
ReplyDeleteThank you. It is the first campaign setback for the EEF.
DeleteBig ask for the EEF for the 2 fortifications and a fun looking game. I like the map as well; kinda lays out the plan. 😀
ReplyDeleteOne fortification too many, but still an enjoyable game to play. I like using sketch maps with planned movements, as units have to adhere to the intent of the plan during the game.
DeleteGreat AAR. A tough one for the EEF, and it came close to the wire. Looking forward to the next campaign installment.
ReplyDeleteIt was one of those games where you want to setup and play again.
Delete"What they said"! Great post.
ReplyDeleteThank you.
DeleteI have just been catching up with this wonderful campaign Peter. It is excellent from inception to the actions so far. I particularly like to see the 1/72 figs on the table too.
ReplyDeleteI look forward to tracking it in 'real time' from here.
Regards, James
Thanks James, it is a joy building the forces with 1/72 figures for the campaign.
Delete