Saturday, 13 May 2023

A Cromwell tank to kickstart my painting and some ACW games

In a recent visit to Melbourne, I couldn't resist dropping by one of the Model Shops, even though I didn't have any particular need. In the shop I came across an Airfix Cromwell tank which seemed like the perfect opportunity to kickstart my painting, which has been rather slow or non-existent lately.

Recent purchase

The completed Cromwell tank

During the week I been playing some quick American Civil War games using One-Hour Wargames rules. I have made a few tweaks to the elimination mechanism, modifying them to test unit morale instead, with the aim of avoiding outright eliminations. Instead, when a unit fails their morale test, they are forced to retire, enabling them to be potentially redeployed for defence or regroup to make attack again.

A game in progress using my old Minifig 15mm collection. 

I use the One-Hour Wargames American Civil War as written with the elimination section replaced by a moral section with the following rules.

Any unit that took hits during the shooting phase must test for moral. The procedure is as follows:

  • Roll 2D6 and double the score. 
  • If the score is equal to, or greater than, the number of hits a unit has taken, the unit passes the morale test.
  • If the score is less than the number of hits, then the unit must retire 12” directly away from the enemy. The unit will pass through any friendly units and must be placed facing away from the enemy.
  • Units are only eliminated when they are forced off the tabletop.
Any unit that has retired during the opponent shooting, may move or shoot during its own player’s turn. Although having the unit face away front the enemy will require it to move, pivoting, to face the enemy.

The tabletop setup for an ACW game.

I am planning to do some more gaming with these ACW armies. I will also be adding a few more cavalry and infantry units to them. Using some Minifig miniatures I had purchased 40 years ago but never got around to painting. They have been sitting in storage for all these years, but I'm now motivated to finally put some paint on them and get them on to the tabletop.

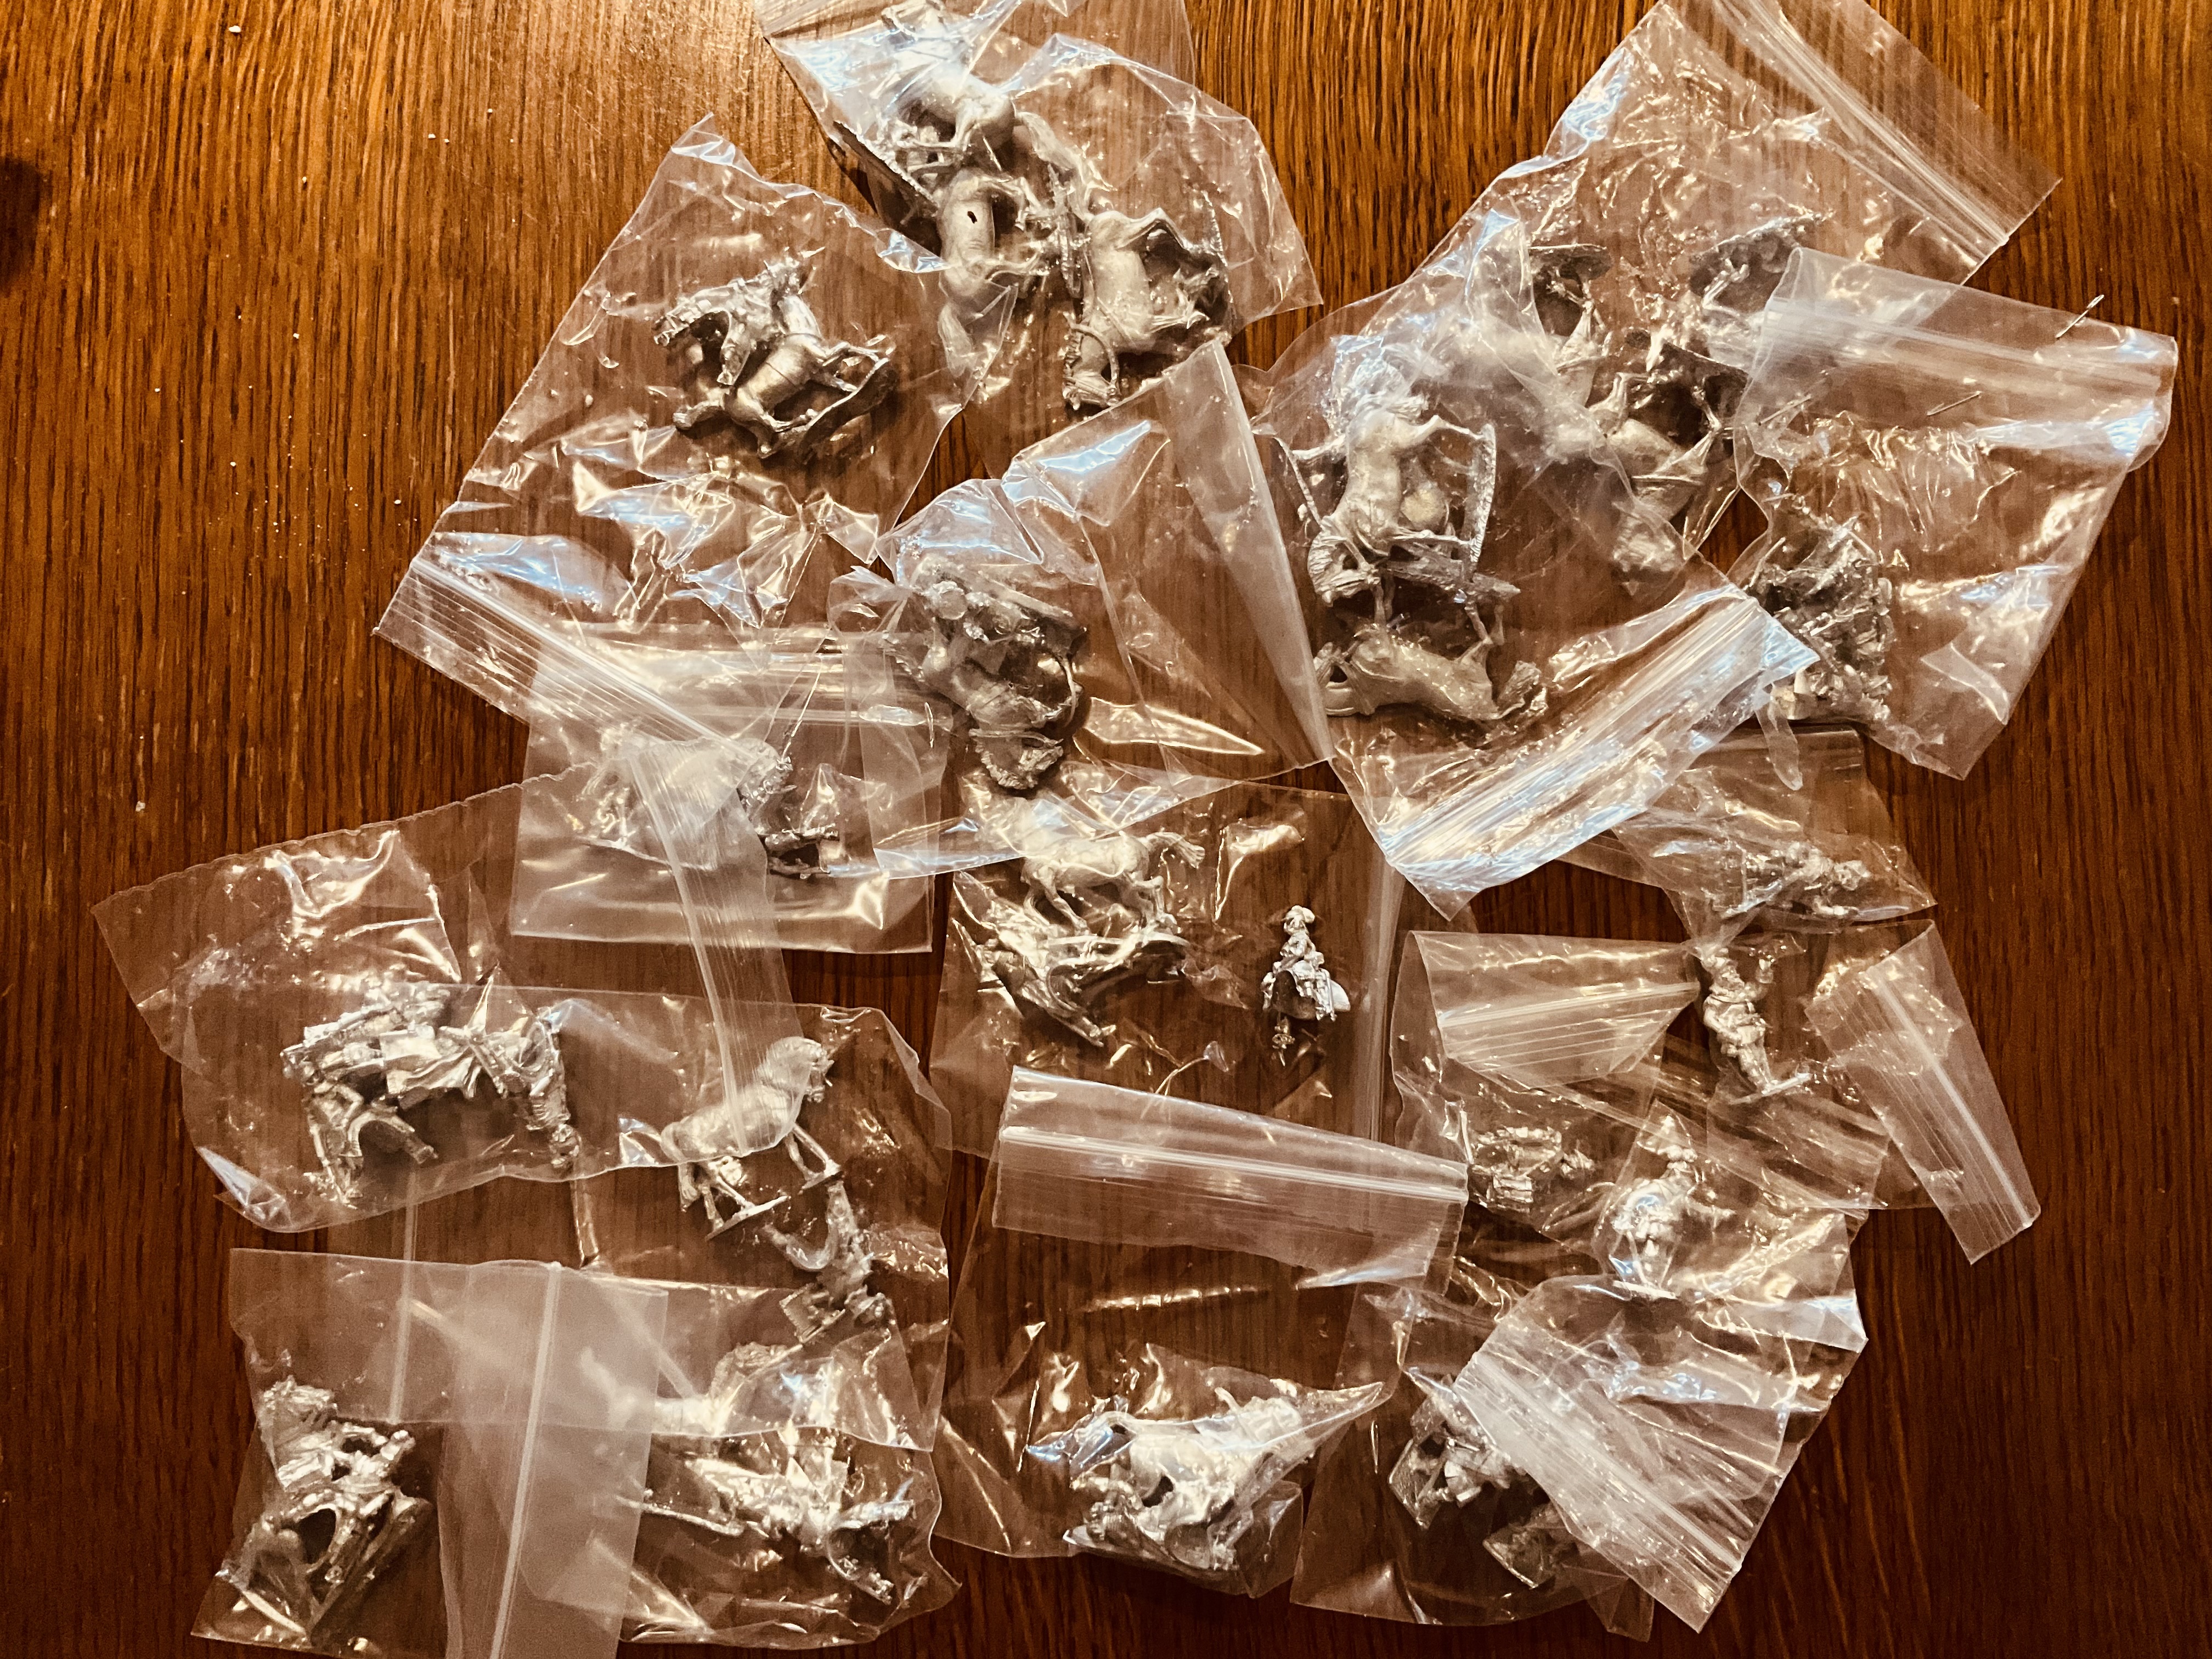
A few Minifigs finally see the light of day and will make there way to the painting table.


Saturday, 6 May 2023

Connecting or mashing up a couple of tabletop layout ideas

A lot of my wargames rely upon scenarios from the book "One Hour Wargaming”, either as one off games or incorporated into campaigns. When setting up the tabletop using these scenarios, I generally end up doing two things: 

  1. Modifying the scenario map so it fits with using a 6x4 foot tabletop. This essentially entails stretching the map which is drawn for a 3x3 foot tabletop into 6x4 foot dimensions.
  2. Adding additional terrain features as the tabletop can look very empty otherwise. 

As I replay the scenarios, especially my favourites, I am increasingly finding myself adding a number of terrain features to help add a bit more variation and interest, such as small woods or a knoll here and there.

An example of One-Hour Wargames scenario 7 - Flank Attack (2) using Minifigs 15mm ACW figures.

Anyway, Last week I was travelling to New Zealand to visit the adult children, and to keep myself occupied while waiting at the airport or on the flight, I was reading a book about English Civil War battle of Edgehill. The book was recommended in one of the comments from a post a few weeks ago (a quick thank you for the tip). 

Current reading “Edgehill 1642”

One of the interesting chapters in the book is about how they went about trying to interpret and piece together the battlefield and its features using the different sources and written accounts of those at the battle. Often written many years later, these accounts could have different or conflicting views on the battlefield terrain.

This got me thinking about my approach when I’m laying out terrain features on the tabletop for a game, and whether there was a better or more systematic way of doing things. This jogged a memory about a technique used in the book “Programmed Wargames Scenarios” by Charles S. Grant for selecting tabletop layouts.

A very useful book for solo Wargames

Many of the scenarios in the book use an approach where different versions of a battlefield layout are drawn and then decided by the dice. This clever technique creates a geographical “fog of war” when deploying forces, particularly so for earlier periods when armies on a campaign had none or few accurate maps. 

Example from the book with 3 different options for the left, centre, and right sections of the tabletop. 

The scenario maps were divided into three sections: left, centre, and right. Each section has three variations of the terrain which fits with any of the adjacent sections. So a road or river going across the map would always link regardless of the sections selected with a dice roll.

Prior to selecting the left, centre, and right sections. Each army must write orders or draw their deployment. This can create a few problems for players, for example, they find some difficult terrain in front of their cavalry or a an unexpected building which can assist the opponents defence.

So, I thought I would try and apply the Programmed approach to one of the One-Hour Wargame scenarios. I picked the scenario Flank Attack (2) which is one of my favourites. The first step was to take the map from the book which is for a 3x3 foot tabletop and stretch it to a 6x4 foot tabletop.

Scenario map for Flank Attack (2) modified for a 6x4 tabletop

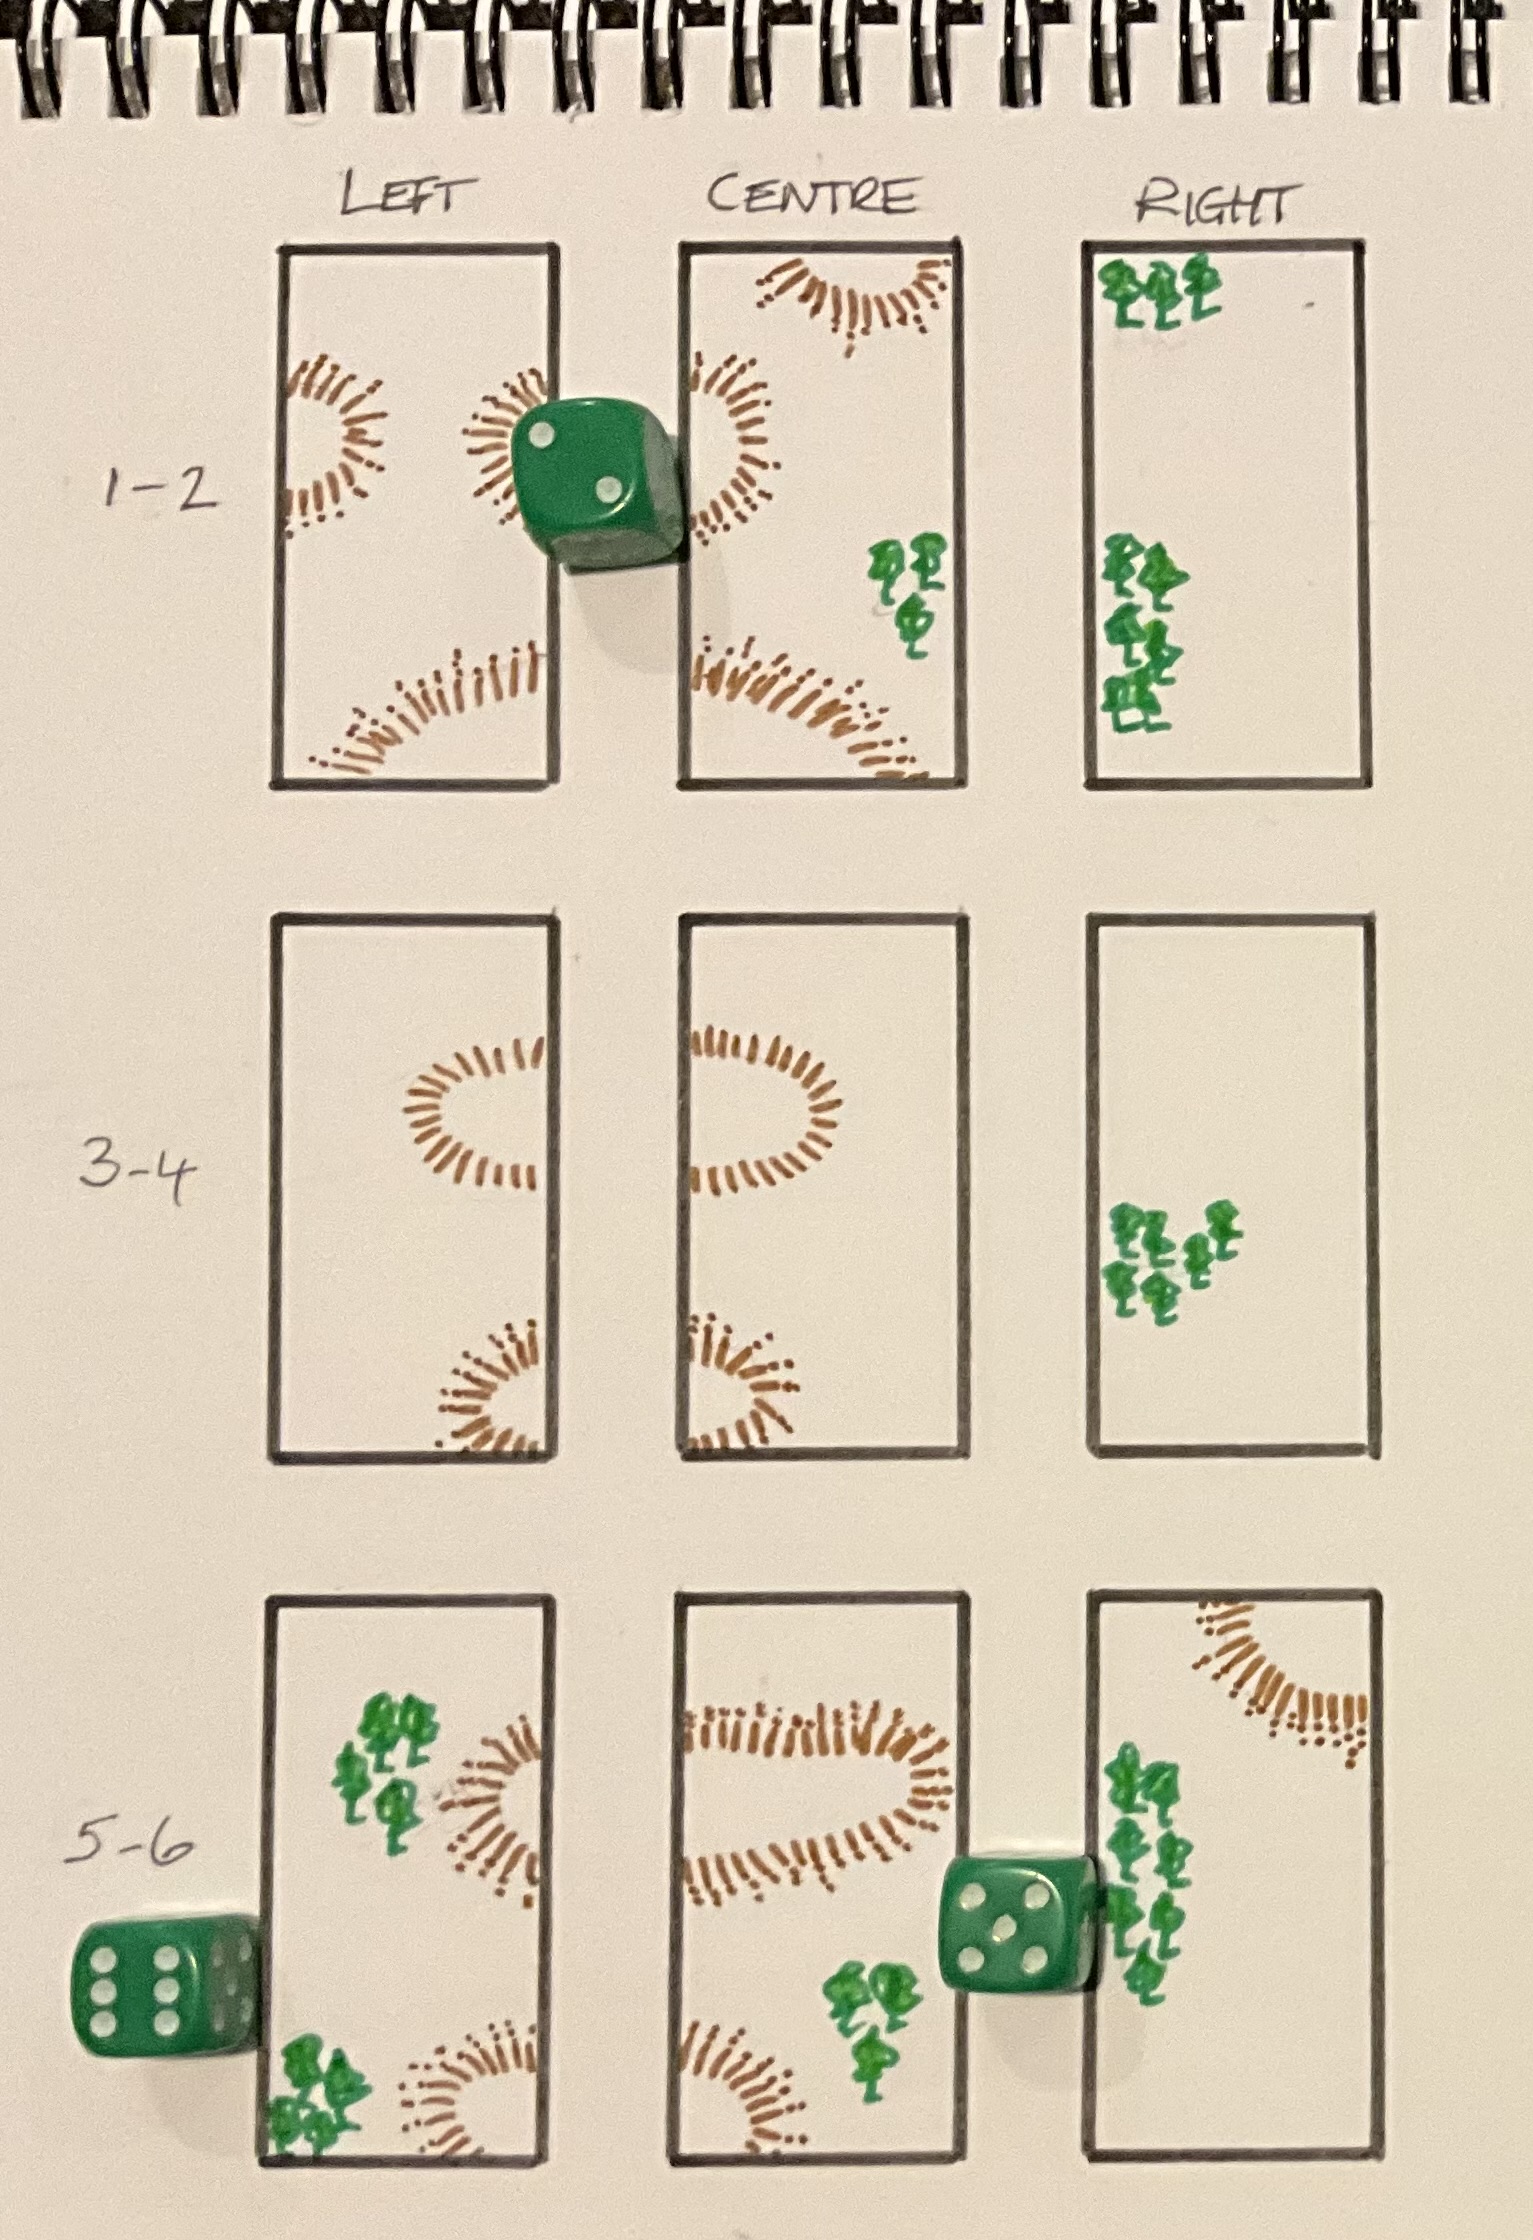
Having drafted a map it is divided into the left, centre, and right sections. Then each section is reworked into three options which are slightly different. In the picture below the centre row (dice 3-4) represents the above map.

One-Hour Wargames scenario Flank Attack (2) map has been modified to create different terrain options using the Programmed Wargaming Scenario approach. After writing down the deployment, roll the dice to decide the tabletop layout.


The left section selected by a 6, the centre by a 2, and the right section by a 5.

I cut out the sections to help show how the selected sections fit together to create the map.

The final tabletop setup

With the tabletop setup determined the next step is to see how the forces are deployed based upon their prior written orders. Using the ACW forces already set up we find few changes with the Union deployment. However, than two of the flanking units find themselves positioned on a hill and the other two facing woods which they will have to navigate. 

The Confederate force deployment is not quite as planned. Their main line is anchored on a small hill (the scenario objective) and the remaining line spread out in the valley with their cavalry now positioned on a second small hill. There is no nice long ridge to defend as expected.

A view of the troops deployed with limited prior knowledge of the tabletop layout. 

A better view of the Confederate troops spread out in the valley between to small hills.

The half the Union flank attack will now have to navigate the woods.

Anyway, the tabletop is now setup and ready for a game. Time to stop posting and play!

Wednesday, 26 April 2023

A couple of useful items ground at a craft shop

As my wife was going to a craft store I tagged along as usual to have look to see if there were any items I could make use of on the tabletop. I found a couple of items, some wood craft sticks which I thought could make some useful markers and some grey felt which was not a flat colour, but mottled or speckled grey.

woodcraft sticks and felt from a trip to the craft shop.

In my English Civil War games I need to track which units are out of ammunition and also when they have been rallied. I figured the wood craft slicks, which are approximately 2.5 inches long, could be painted green and written on for markers. When completed they look reasonably discrete positioned behind the unit bases. They are much easier to pick up to move compared to cardboard markers.

The markers are added behind the units.

A couple of weekends ago I made some pavements out of MDF board which I painted (see here). This time I used the mottled grey felt which I just cut out the shapes. While I prefer the painted MDF board, the felt is a much easier option to make.

The grey mottled field cut out and positioned under the buildings.

Just before we were leaving to visit the kids in Wellington, New Zealand, some Hinchliffe ECW Models from Lancashire Games arrived in the post. I am adding a few more units and commanders to my collection.

Recent ECW arrivals


Saturday, 22 April 2023

Adding to the English Civil War solo wargaming decision cards

This week I have added two decision cards, a deployment card and shooting priority card, for playing solo English Civil War solo games. These decision cards provide guidelines to assist the solo wargamer in playing a battle against an opposing English Civil War army on a tabletop. The decision cards can also be adapted for collaborative gameplay with multiple players facing off against a card-driven opponent or for solo observation, where both armies are controlled by the cards. The cards serve the following purposes:

  • To determine the deployment of each army
  • To establish each army's stance (retire, hold, and attack) and associated tactical actions at the start of each turn
  • To prioritise unit movement and charges for the army’s stance
  • To determine target priority when shooting
The flow of decisions. The deployment card is only used once when setting up the game. The army stance is checked at the start of each game turn to determine the tactical action card to be used to guide movement. Finally the shooting priority card determines the targets when units shoot.

While all the guidelines can fit onto a few sheets of papers. I prefer to use cards when playing the game, having the tactical action cards to hand when moving the units means no flicking through pages.

The cards printed up and stuck to cardboard.

I have tried to make the decision cards to be rules agnostic, but there will be some activation mechanisms that are not suited, particularly where movement in a game turn switches between the armies during a game turn. 

Rather than take photographs of the cards here is the write up.

Army Deployment

When determining an army’s deployment of troops follow these steps:
  1. Divide the army’s deployment area on the tabletop into three zones: right flank, centre, and left flank. The troops will deploy in these zones in one, two, or three lines depending upon the units involved and their numbers.
  2. When there are two or more infantry units, they are split the units into two equal groups and placed in the centre and centre reserve. Where there is an odd number of units, the additional unit goes in the first line centre.
  3. Cavalry are split into two equal groups, one for the right flank and one for the left flank. and placed in the centre and centre reserve. Where there is an odd number of units, the additional unit goes in the right flank. When there are two or more infantry units on a flank, they are split the units into two equal groups and placed in the flank and flank reserve. Where there is an odd number of units, the smaller group is positioned in the flank reserve.
  4. Dragoons and commanded shot units are split into two equal groups, one for the front line of right flank and front line of left flank. Where there is an odd number of units, roll a D6 and on a 4-6 place the larger group on the right flank. Where possible dragoons and commanded shot will take advantage of terrain for cover.
  5. Artillery are placed in front of the centre.
  6. Commanders are placed between the right flank reserve and centre reserve.
The flank and centre zones

While deciding the deployment of an army also decide upon the characteristics of the commander. Use a D6 to determine:

1-2 Cautious
3-4 Steady
5-6 Impetuous

The commanders characteristics will influence the stance an army will take during the battle.

Here is an example of an army waiting to be deployed…

Before deployment - there are 5 x cavalry, 2 x artillery, 1 x dragoons, 1 x commanded shot, and 5 x infantry.

The army deployed…

The army deployed.

  • The odd numbered cavalry were split into a group of 2 and group of 3. The larger group was positioned on the right flank and because it had more than two units was split into two and and small group placed in reserve.
  • As with the cavalry, the infantry had 5 units split into groups of 2 and 3. The larger group positioned in the centre and the smaller in centre reserve.
  • Artillery were placed in front of the centre. 
  • The dragoon and commanded shot units were placed in front of the flanks. I diced to see which flank the commanded shot were to be position and the dragoon unit was placed on the other flank.
Just a final note. If using a commander in the rules, then they are positioned to the right of the centre reserve.

Army Stance Card

Decision table for determining an army’s stance is checked at the start of each player’s turn. Work through them in the order they are written. Then select the tactical action card which is first met.

1) The army will retire if any of the following apply:
  • It is has lost more than 50% of its units AND rolls a 4+. The score is modified by a commander’s characteristic: -1 if impetuous or +1 if cautious or the commander has been forced from the field of battle.
2) The army will take a hold its position if any of the following apply:
  • It is the opening turn of the battle and the army has artillery.
  • If it holds the objective it was tasked with taking.
  • It is outnumbered AND rolls a 4+. The score is modified by their commander’s characteristic: -1 if impetuous or +1 if cautious or the commander has been forced from the field of battle.
3) The army will attack by default if the above checks do not apply.

Hold Tactical Actions

During the movement phase apply these actions in the order they are written until no more than half an army's units, ignoring artillery, have moved or the end of the list is reached.
  1. Any unit can pivot to face an the closest imminent threat.
  2. Dragoons and commanded shot units, if not holding an objective or within 12” distance of an enemy unit, even an engaged one, will advance to harass enemy unit taking cover where possible.
  3. Cavalry units will charge other enemy units within charge range. Target cavalry first, then the closest unit.
  4. Infantry out of ammunition will advance if being shot at, unless they have a terrain advantage or hold an objective.
  5. Infantry will hold their position, only moving their reserve to protect the army flank, fill gaps in the line, or help hold an objective.

Attack Tactical Actions

During the movement phase apply these actions in the order they are written until no more than half an army's units, ignoring artillery, have moved or the end of the list is reached.
  1. Any unit can pivot to face the closest imminent threat.
  2. Dragoons and commanded shot units, if not holding an objective or within 12” distance of an enemy unit, even an engaged one, will advance to harass enemy unit taking cover where possible.
  3. Cavalry units will charge other enemy units within charge range. Target cavalry first, then the closest unit.
  4. First line cavalry units starting with the strongest flank, or the right flank if of equal strength, will advance to engage the opposing enemy flank units, targeting enemy cavalry first. If not all can move, always start with the rightmost unit.
  5. Cavalry units move to position themselves to charge enemy units, preferably in the flank or rear.
  6. Infantry in the centre will advance until they can engage the enemy. If not all units can advance this turn, start with the right most infantry unit unless there is a unit trailing behind, then advance that unit to maintain a consistent line.
  7. Infantry units out of ammunition will advance to engage enemy.
  8. Reserve units, first cavalry and then infantry, will advance to fill gaps or position themselves half a move behind the first line. Start on the right hand side.

Retire Tactical Actions

During the movement phase apply these actions in the order they are written until no more than half an army's units, ignoring artillery, have moved or the end of the list is reached.
  1. Any unit can pivot to face the closest imminent threat.
  2. Cavalry units will charge other enemy units within charge range. Target enemy cavalry or the closest enemy unit.
  3. Artillery units retire or remove from play, depending upon rules.
  4. Cavalry will retire.
  5. Infantry will retire.
  6. Dragoons and commanded shot will retire.

Shooting Priority

During the shooting phase apply these rules to determine shooting priority.

Infantry - Always target infantry units first, then the closest unit. If distances similar similar distances, then shoot the unit which is most directly in front.

Dragoons and Commanded Shot - Always target cavalry units first, then the closest unit. If distances similar similar distances, then shoot the unit which is most directly in front.

Artillery - Always target infantry units first followed by cavalry units, then the closest unit. If distances similar similar distances, then shoot the unit which is most directly in front.

Final Notes

Most of the games I have played with the decision cards have used a variation of One-Hour Wargames with an IGO-UGO activation approach, or an approach used from the book “With Pike and Musket” where you dice to determine which army moves first, then after both have moved shooting and melee are simultaneous.

A good fifty percent of the games had both armies controlled by the cards. This proved to be quite entertaining as both army had the same constraints applied to them. The exception being the commander’s characteristics.

I will no doubt find some errors in the decision cards and will update them. Thank you to those who have flagged my typos and made suggestions in the comments. They are much appreciated.

What is next? I will be running a few more games using scenarios which are not a traditional set battle to see how the decision cards cater for those situations.


Saturday, 15 April 2023

Terrain additions - pavements/sidewalks and a church

In addition to playing English Civil War games recently, I've dabbled in a few tabletop games set in WW2. When setting up a small village in these games, I typically use 3 to 4 buildings to create the scene. However, I recently had the idea to enhance the village's appearance by incorporating pavements or sidewalks.

A few buildings representing a small village.

Adding some pavements/sidewalks help to improve the look and impression of a village.

In order to make the pavements/sidewalks, I used rectangular pieces of 3mm MDF board. I applied a coat of grey paint and then added a black wash. After allowing it to dry, I dabbed on various shades of grey to create the appearance of paving stones. The buildings are simply placed in the centre of the rectangles when required or not if an individual farm building.

After being painted grey and having a black wash applied the paving stones are applied as dabs of paint.

Various shades of grey are used with the dabs of paint.

As I was making terrain I thought I would also add a church to my collection as it is one building I lacked with my existing collection of wooden block buildings. A couple of previous posts show the process for making these wooden buildings here and here. These buildings are very much wargaming models and get thrown into the terrain plastic tub when not in use.

A village church is added to the collection.

Another view.

The village with pavements/sidewalks.


Thursday, 13 April 2023

Solo ECW Decision Cards

An English Civil War game underway. Recent games have doubled the number of units in the games.

Last week I reworked my solo English Civil War (ECW) decision cards so they are all of the same size and stuck them to cardboard. The cards are still structured with the Army Stance card that determines at the start of each player’s turn whether an army is attacking, holding a position, or retiring. The tactical cards cover combat tactics depending upon the Army Stance chosen and prioritise unit movement.

The updated cards have been stuck onto card. A closer look shows a few scribbles as I continue to refine the cards.

So far, the decision cards seem to be working well when both armies are directed using the cards, decision tables versus decision tables so to speak. This approach helped to speed up the testing of the decision cards. The next stage involves playing a few more games in which I, as the solo wargamer, will be playing against an army directed by the decision tables.

A game in progress where movement for both sides is being determined by the decision cards. 

Initially, I when began experimenting with using decision cards it was with smaller armies consisting of 6 to 8 units, where the number of units allowed to move was based on a D3 dice score. My aim is to be able to use decision cards with armies of any size, an ideal size for me being 12-15 units. To achieve this, I have used an approach that permits up to half of the army to move, ignoring artillery units and rounding down any fractions, rather than relying on a variable number determined by the dice.

The Army Stance decision card now includes some variables based upon the commanders characteristics.

After reading through the suggestions and ideas in the comments from my last post on decision cards, another modification was made. This involved the inclusion of variables in the "army stance" decision table to represent the commander's nature, whether it be aggressive, passive, or balanced. If someone can come up with a better term that “average” or “balanced” in the comments that would be most useful.

The Attack tactical card has the most instructions.

A added a few pictures of the period to the cards to help jazz them a bit.

There are still a few adjustments to most cards.

As I play a few more games using these cards my focus will be to try and make the instructions as clear and simple as possible. I also plan to make another couple of additional cards. The first will be one covering the decisions on the prioritisation of targets for shooting and melee. This will allow me to do priority by unit type and remove the target prioritisation from the rules. The other card, Deployment, will be used at the start of the game and will determine the deployment of troops to the centre and flanks.

This sketch shows how the deployment and shooting/melee priority cards will fit in.

Finally another photo of the game towards the end.


Tuesday, 11 April 2023

Some quick fields and sprucing up some roads

Lately, my painting and modelling activity has been quite slow. Therefore, in order to get back into the swing of thing's, I focused on finishing a couple of tasks which have been on my list for a while now. Specifically, finishing a couple of fields made from corduroy material, and adding a dirty/dusty to some felt roads.

The material in the left is dry brushed with a sandy coloured paint.

After the sand colour dry brushing dabs of green are added around the edge and dabbed on some of the ridges to indicate some plants are growing to add variety.

On the left another option is to dab on larger dots of green.

The felt roads get a dry brushing too to give them some texture.

The roads and fields in use on the tabletop.

20 minutes of work improves their overall look and stops them looks as stark on the tabletop.