Just a quick post this weekend as I am writing this on my phone having run out of time during the week before jumping on to a fight to Wellington, NZ, to see my Daughter and old work colleagues from when I lived there.
The opening campaign moves were made and the first action is setup and waiting for my return.
 |
| First action of the campaign waiting to be played. |
I did revamp the campaign counters to better reflect an ACW theme and uniquely identify each division with the commander’s name. Division identification is required to track the unit composition as the battle unfolds and the division become exhausted.
 |
| A reminder of the starting positions with counters now uniquely identifying divisions. |
This is a solo campaign and this time I am picking the attacking union forces. In my last solo campaign I was the defending WW2 British so it was time to switch.
The approach I am taking is to write down the orders for each side. For the union side I only write one set of orders which will be applied. For the Confederates I write two sets of orders: a likely set of orders and a less likely set (which may be the more riskier approach). All orders must include the sequence the orders are applied to the divisions.
Once all orders are written, then I dice for which confederate orders are applied. Rolling a D3 dice the most likely orders are applied on a 1 or 2, and the less likely on a 3.
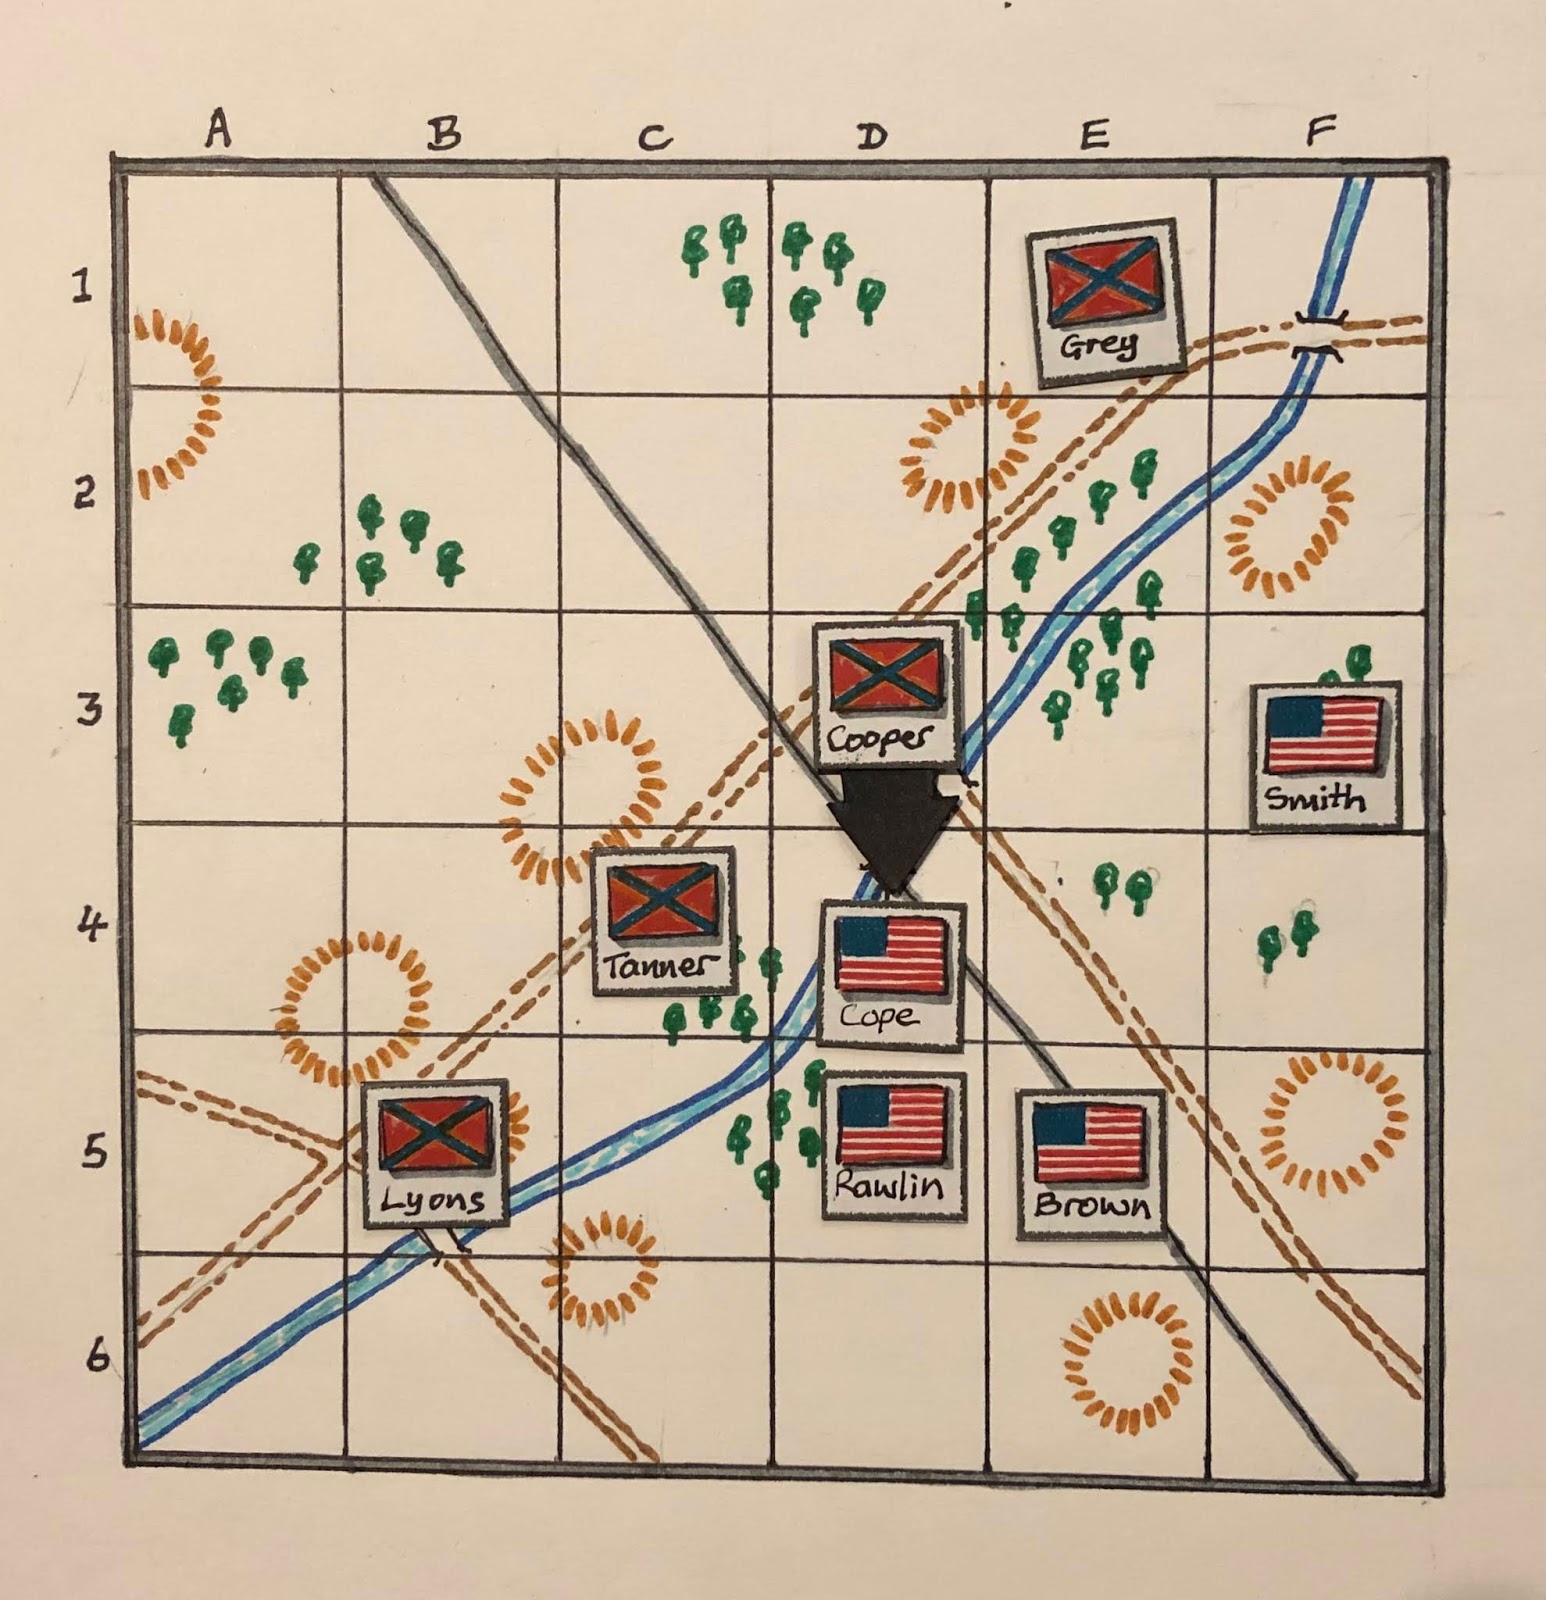
 |
| The campaign battle map after orders are applied. |
When applying the orders I dice to see which side moves their first division. Then roll a D3 and the division can move that many squares (no diagonal moves allowed). This process is repeated with each side alternatively moving one division at a time. A division must cease movement if adjacent to an enemy unit. When this occurs and the enemy is blocking the intended move, the action is transferred to the tabletop for a game.
Another book arrived during the week, which will be read this weekend.
 |
| Recent secondhand arrival |


Look forward to seeing this played out once you've returned from your trip down under. Hope you have a lovely time.
ReplyDeleteThanks. All being well the game should be played and posted this week having just returned to Melbourne today.
DeleteBold move by the Rebs seeking to cross the river they're defending - might catch the Union by surprise, but looks like putting your head into the lion's mouth to me. What's the thinking behind it?
ReplyDeleteFrom the map, it looks like Coopes is moving to defend the railway bridge. The problem I foresee is that Coopes will be in the difficult position of trying to defend two bridges from attack. Tanner may been a better choice to move to defend the railroad bridge but we will see.
DeleteGreat looking map!
Cooper's division is moving to defend the railway bridge, while Tanner's division has moved up in support. A blunder on my part when writing the orders as Tanner should have moved in behind Cooper.
DeleteThis comment has been removed by the author.
ReplyDelete