This post unfortunately has no photographs of the game which I deleted after a hurried tidy up. Doh! After that admission of foolishness on to the campaign and overview of the game with maps only.
On the campaign map the previous game in the centre reflected a game between two armoured forces.
 |
| Campaign Map |
The defending force card was revealed for the second game and we have an armoured force attacking an infantry force in defensive positions. This is a critical game for the Allied forces who if they suffer a second game loss will have to retire all forces by one zone on the campaign map.
Orders of battle are...
Allied forces
3 x HQ
3 x Reconnaissance Units (A/C and Carriers)
6 x Infantry
3 x AT (no more than half can be 6 pounders)
4 x Matilda and Valentine Tanks
2 x Artillery (25 Pounder and 5.5” Gun)
Additionally Allied forces can add 6 improved positions and 12 minefield hexes.
Axis forces
3 x HQ (2 x HQ if less than 12 units)
4 x Reconnaissance -(2 x AC, 2 x Armoured Infantry)
8 x Tank (2 x PzII, 5 x PzIII, 1 x PzIV)
2 x Infantry
2 x AT Guns (one SPG)
1 x Artillery (SPG)
1 x 88mm Gun
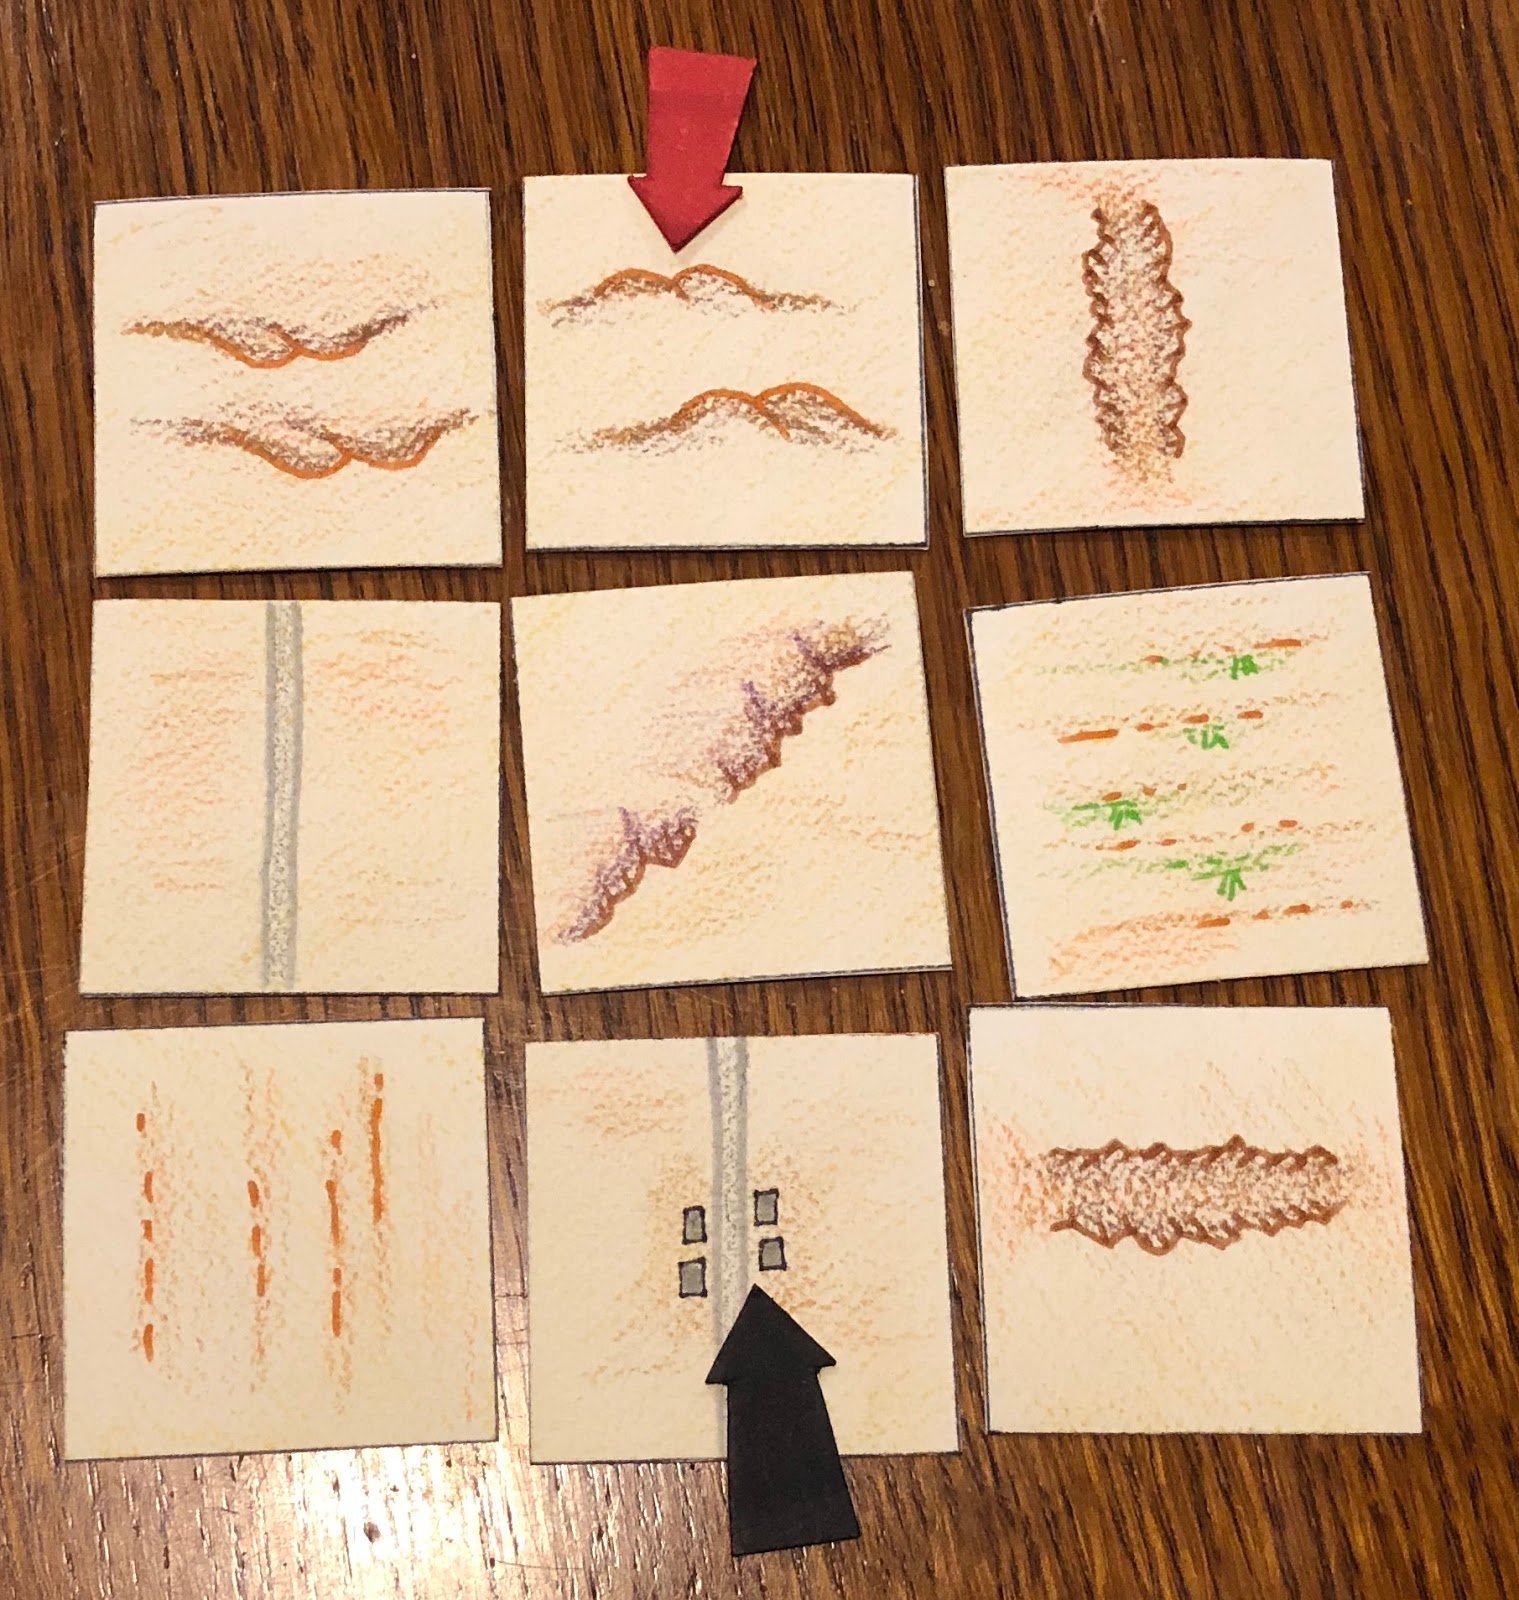
With the forces identified the next step is determining the terrain setup. Cards were drawn and laid out. The defending Allies chose their base edge and decided not to switch any of cards vertically. The attacking Axis forces are able to switch to adjacent cards horizontally, and chose to push the escarpment terrain into the centre in the hope of splitting the defending forces.
 |
| Allied forces pick their base edge to defend. |
 |
| Axis forces move the escarpment into the centre. |
 |
| The end position is used as a guide for setting up the tabletop. |
With no photographs this game report will be rather brief and will rely on the maps. The Allied force had dug all its infantry and AT guns in a series of improved position across the centre of the tabletop. Minefields had been added to those defending the two tracks. The majority of available armour made up of Matilda and Valentine tanks were position in the centre to support either flank. Armoured cars and carriers were position to support their left flank and defenders in the rough terrain.
 |
| Initial positions |
Axis forces arrive and quickly focused on the Allied left flank and the defenders positioned in the rough terrain. While this approach avoids the minefields, the rough terrain reduces the mobility of their armoured forces which cannot enter rough terrain hexes.
The advance quickly slowed down and a few tanks that strayed too close to the escarpment were lost to AT guns. As the direction of the attack became known Allied tank and armoured car forces were pushed to bolster defences.
 |
| Axis forces attack the Allied left flank. |
By midday the longer ranged German weapons were able to dislodge the defending infantry and AT guns. However, their tank units were unable to work their way around the rough terrain as all routes were blocked by Allied armour.
 |
| Any Axis breakthrough was blocked by Allied armour. |
Axis infantry was rushed up to assist with taking the rough terrain, as their tanks took on the well armoured Matilda tanks. As the afternoon progressed Axis tank numbers prevailed and a breakthrough was achieved.
 |
| A hard earned breakthrough is achieved in the afternoon. |
A second Axis victory which in the context of the campaign means the allied forces will retire one zone on the main map. A second campaign turn will now begin again with supplies and selecting whether they are directed to attack, defence or replacement of lost equipment.
 |
| Campaign map after Allied forces retire one zone. |


Great looking maps there Peter. This is a great little campaign.
ReplyDeleteThank you I am looking forward to progressing the campaign.
DeleteInteresting outcome - I thought with all those infantry tanks and some better ATGs the Allies might hold out - I shall have to dig into the rules. Is there ever an opportunity for the attackers to arrive from an unexpected base edge? All these frontal attacks don't feel like N Africa.
ReplyDeleteI have yet to post the game setup rules. I forgot to do that this week, not a good week with deleting photos and all. There is a 33 percent chance of a flank attack, delayed re-enforcements, or interdiction reducing available units.
DeleteEven with no 'photos it was easy to follow the action via your wonderful maps. Will the Axis start to experience supply issues as they advance forward? I will be interested to see. Keep up the great work on this campaign.
ReplyDeleteThanks. Both sides will have a choice in the next campaign turn. For the Axis it will continue to attack or replace losses, and for the Allies do they build defences or resupply.
DeleteAn additional question: your maps, which are worthy of a book; do you draw more and more arrows on the same map or do you copy them after each turn and then add more arrows. I suppose I'm wondering how many maps you end up with after a game; one or lots?
ReplyDeleteI draw the maps and add the unit positions. Then add the arrows for the different stages of the game. So just one map and hopefully no mistakes.
DeleteAs always, love your maps and terrain cards!
ReplyDeleteI certainly needed the maps for this post. Thanks.
DeleteThis is very cool. I will be following the progress of this with interest.
ReplyDeleteI have just finished painting up both armies for a new collection/era and since our group can't play for who knows how long, might venture into a solo campaign.
Thank you. I am hoping this campaign will keep me occupied in the current period of uncertainty.
DeleteExcellent, Peter, thanks for sharing! Very handsome, even without the pictures. My only regret was not seeing a picture of the table itself; I'm always interested in how you translate your terrain cards into an actual miniatures wargaming table. I'm looking forward to the fights in Turn #2.
ReplyDeleteV/R,
Jack
I divide my tabletop into 9 zones and for each feature on the terrain card 3 hexes of that type get placed randomly in zone.
DeleteGotcha, Peter, thank you.
DeleteV/R,
Jack