Over recent weeks I have been gradually painting a few more additional units for my generic Medieval armies. Additionally, I have been messing around with activation modifications to the One-Hour Wargames (OHW) Medieval rules. The draft of these can be found at the end of this post. So the time seemed right to consider another scenario for the tabletop. Searching through "Wargaming Ancient and Medieval Period" by Donald Featherston the Battle of Auberoche looked quite interesting, and also a bit of a challenge to wargame given the disparity between the force numbers on each side.
Set during the Hundred Years war, the Battle of Auberoche was fought on 21 October 1345 between an Anglo-Gascon raiding force of 1,200 men commanded by Henry, Earl of Derby, and a French army of some 7,000 commanded by Louis of Poitiers whose forces were besieging Auberoche.
 |
| Tabletop with initial unit deployments |
 |
| Wargaming Ancient and Medieval Period |
The Earl of Derby gathered together a force of 400 men-at-arms and 800 archers to raid the french positions, catching the unsuspecting french while in camp early evening. The Anglo-Gascon archers emerge from the woods and fired into the camp while the Earl of Derby and his men-at-arms charged the French who were desperately trying to prepare for battle. The beleaguered garrison see the attack charged out to join the battle with every available mounted men-at-arms. French were never able to recover from the initial surprise and had to flee the battle.
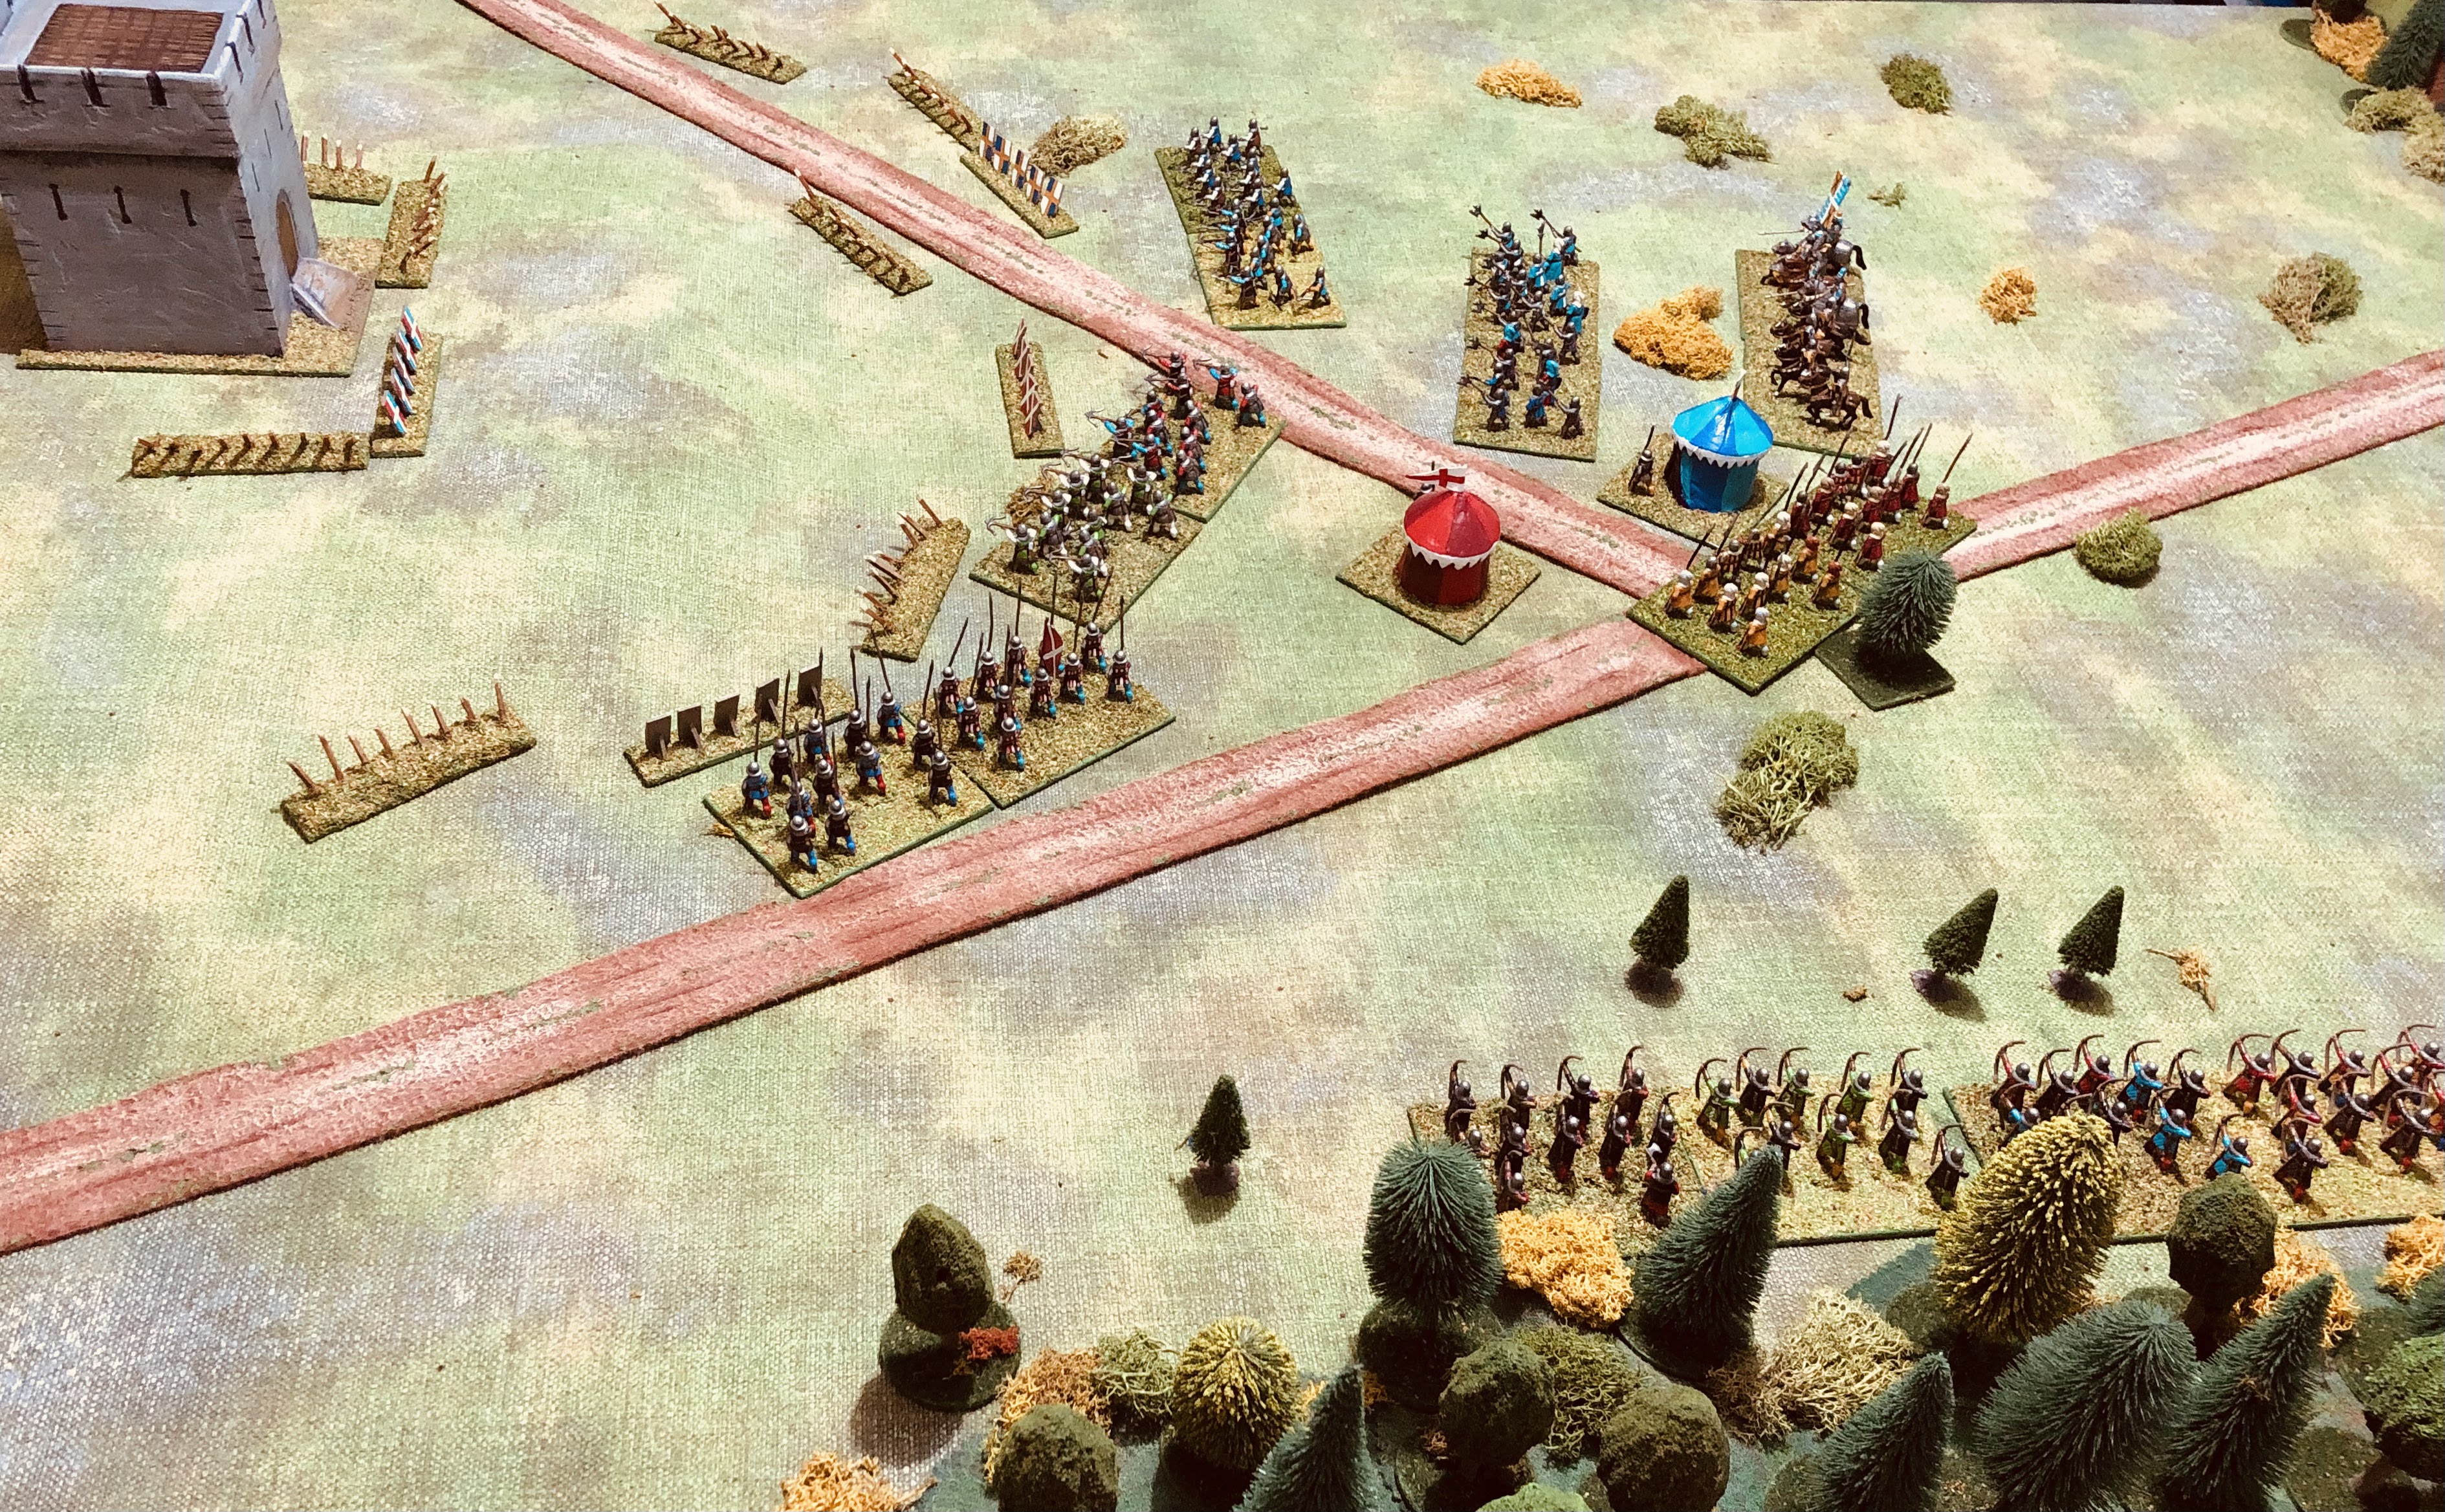 |
| The French camp |
 |
| Anglo-Gascon forces appear from the woods |
Having read the chapter about the battle I remembered there was a scenario in One-Hours Wargames (by Neil Thomas) roughly based upon the battle (#22) called Ambush. It is one of the scenarios from the book I have yet to play, so I setup the tabletop. To win the Earl of Derby's force of 4 units must eliminate all 6 French units by turn 15.
I opted to choose the order of battle rather than have it randomly created:
Anglo-Gascon Force
- 2 x Bowmen
- 2 x Mounted men-at-arms
French Force
- 1 x Mounted Men-at-Arms
- 1 x Foot Men-at-Arms
- 2 x Bowmen
- 2 x Yeomen/Levy
To factor in the element of surprise French units cannot move or shoot until turn 3, and keep to a minimum the number of men at arms units using yeomen units as many French units were unable to put on their armour.
The Game...
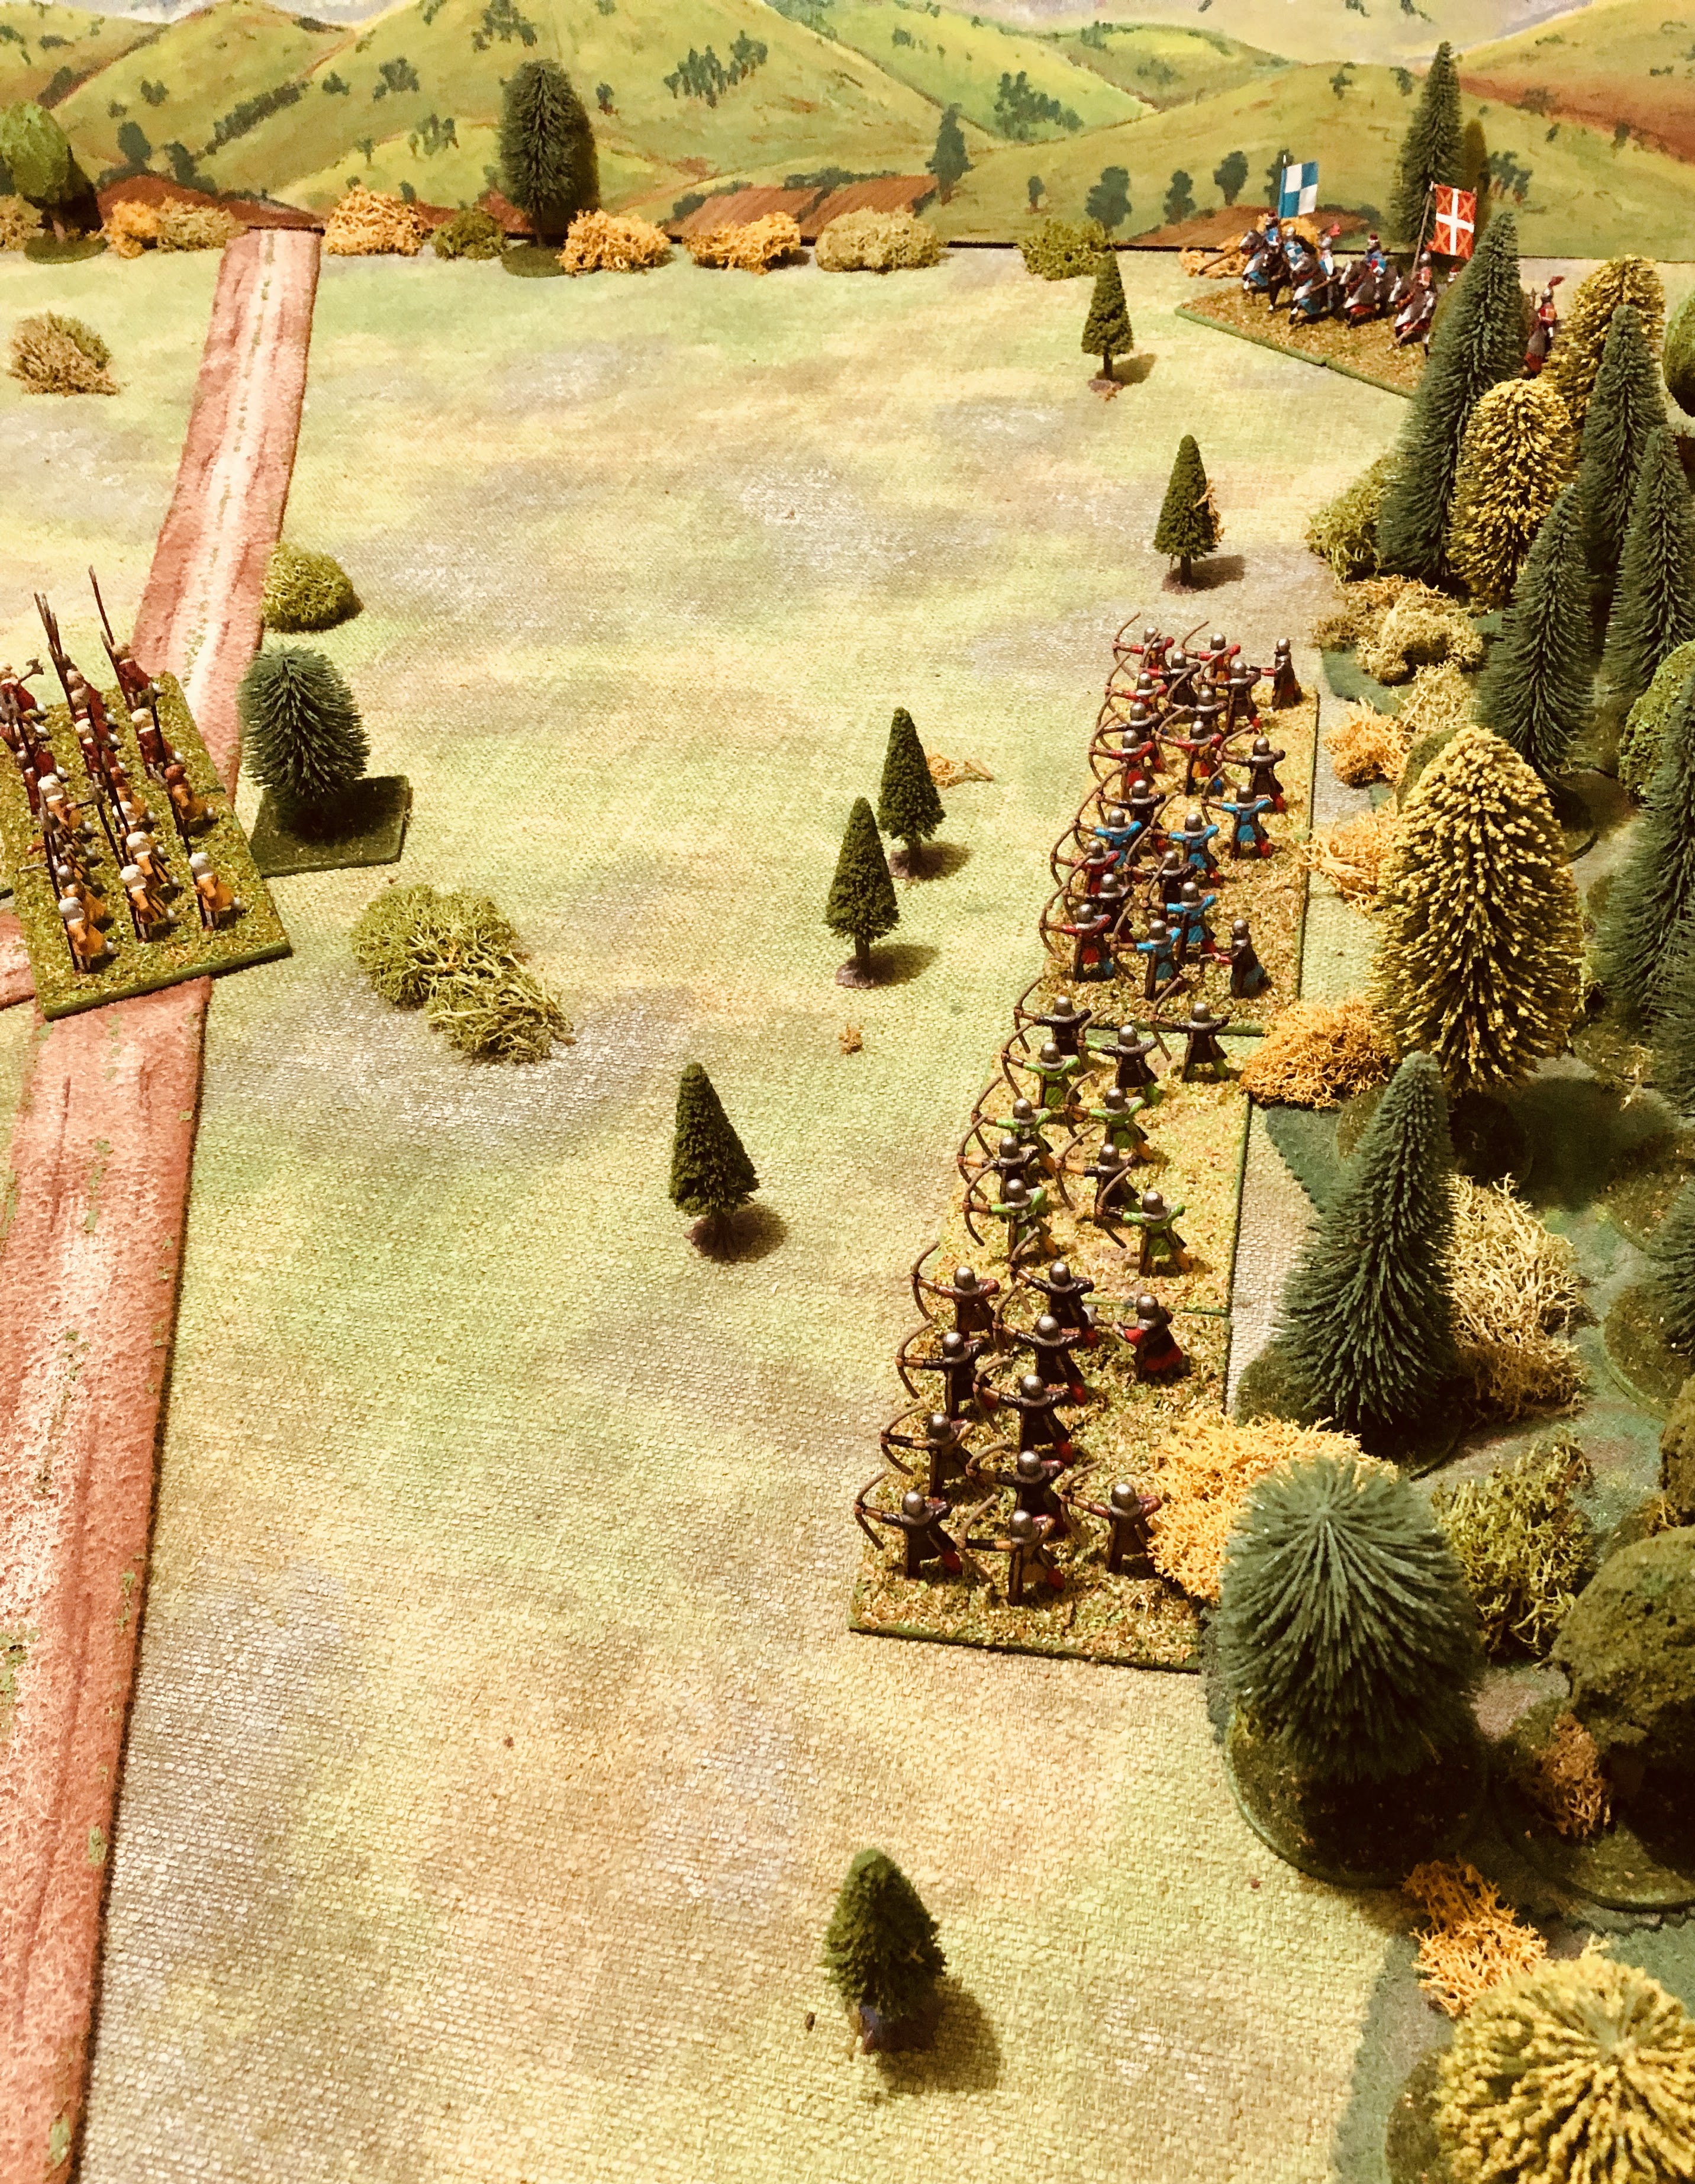
 |
| With all French units facing the castle, the bowmen and mounted men at arms appear. |
On turn 3 the French command were reorganising their lines and quickly realised they were on the verge of having half their force dead or routed. The biggest threat was the mounted men at arms who were making short work of their counterparts. To counter this man at arms on foot were positioned to continue the melee.
 |
| The French begin to organise their defensive lines after being surprised. |
 |
| Men at arms on foot prepare for the upcoming melee. |
Just as the French had stabilised their position, their foot man at arms had forced the Earl or Derby to retire and their crossbowmen had eliminated one of the Anglo-Gascon bowmen units, mounted men at arms charged out from the castle to join the fray. They charged into the French men at arms who turned to receive them. The Earl of Derby was able to regroup and charge back into the melee, which turned the tide in favour of the earl's forces.
 |
| Just when the French think they have seen off the raid, the castle garrison charge out. |
 |
| The French men at arms stand their ground, but they will soon be assailed on all sides. |
Having lost their men at arms and attached commander the remaining French crossbow unit began to retire from the field of battle harried by two exhausted mounted units.

History repeated itself and a victory to the Earl of Derby and his Anglo-Gascon raiding force.
Draft rules used...
The game used a variant of Neil Thomas’ One-Hour Wargames Medieval rules which include the use of an activation mechanism for movement, shooting, and combat. In combat any failed activation in forces a unit's retreat. As the game progresses and unit hits mount, the chances of activation decrease, and can be further compounded if a commander is lost.
Another change was to the movement and shooting allowances, which were increased from 6" to 8" and 12" to 16". The One-Hour Wargame scenarios are set for a 3x3 foot tabletop and I tend to use a 5x4 foot tabletop so the increased allowances reflect the larger playing area. Additionally all my units have two bases with a combined width of 8".
Units Types
The game uses the following units types:
- Yeomen
- Mounted Men at Arms
- Men at Arms
- Bowmen (longbow and crossbow)
- Commanders (attached to a mounted or foot Men at Arms)
All units need to be consistently based with the exception of Commanders who can be an individual figure.
Sequence of play
Players take turns trying to activate their units. Once they have attempted to activate all their units the other player has their turn to activate.
Activated units can perform one of the following:
- Move
- Shoot
- Melee (Hand-to-hand combat)
To activate a unit roll a D6 and multiply the score by 4. If the score is greater than the hits taken by the unit being activated, the unit performs the action. Units that fail an activation test are in disarray and cannot move, shoot or engage in combat.
The activation D6 score is reduced by 1 when the army’s General is lost.
The game ends after 15 turns.
Movement
Movement Allowances. Units may move up to the distances listed below during their turn:
Foot units - 8”
Mounted units - 16”
Turning. Units turn by pivoting on their central point. They may do so at the start and/or end of their move.
Terrain. Units are affected by terrain as follows:
Woods. These are impassable to all units
Towns. Mounted units may not end their moves in a town.
Marshland and lakes. These are impassable to all units
Rivers - These may only be crossed via bridges and fords
Roads - Units moving by road increase their movement distance by 4” if their entire move is spent on the road. This bonus may not be received if charging.
Interpenetration. Only Skirmishers may pass through other units (and vice versa).
Charge Moves. Charges are resolved by moving the attacking unit into contact with its target. They are subject to the following restrictions:
Turning. A charging unit may turn once, at the start of its move. This evolution may not exceed 45 degrees.
Limited Engagement. Only one attacking unit may contact each face of the target (these being Front, Left Flank, Right Flank, and Rear).
Fighting. Combat is resolved during the Melee Combat phase.
Covering Fire. A unit cannot be charged if it has been fired upon by another unit during a turn.
Shooting
Only Bowmen may shoot, the procedure for which is as follows:
Adjudge Field of Fire. Units may only shoot at a single target within 45 degrees of their frontal facing.
Measure Range. Bowmen have a range of 16”.
Assess Casualties. Bowmen roll a D6. The final score gives the number of hits the target acquires, which is modified as follows:
Cover. Units in woods or towns only suffer half the registered number of hits (any fractions are rounded in favour of the unit shooting).
Armour. Men at Arms on foot acquire half the number of hits ((any fractions are rounded in favour of the unit shooting).
Melee
The procedure for Hand-to-Hand Combat is as follows:
One sided combat. Units only inflict casualties during their own player turn.
Assess Casualties. Units roll a D6. Men at Arms on foot and Yeomen use the unmodified score, Mounted Men at Arms add 2 to the result, and Bowmen subtract 2. The final score gives the number of hits the target acquires, which is modified as follows:
Terrain Advantage. Defenders in woods, towns, on a hill, or defending a river crossing, only suffer half the indicated number of hits (rounding any fractions in favour of the attacking unit).
Armour. Men at Arms on foot acquire half the number of mandated hits (rounding any fractions in favour of the attacking unit).
Flank of Rear Attacks. Units engaging the enemy flank or rear +2 to the registered number of hits.
Movement Within Combat. Hand-to-Hand Combat only concludes with the elimination of one of the contesting sides or a forced retirement due to a failed activation. Units may however turn to face an attack upon their flank or rear, but only if they are not simultaneously being frontally engaged.
Failed Activation Within Combat. Any unit already in combat failing an activation test, must retire a 12" and face away from the enemy. Any blocking friendly units are pushed back with the retiring unit. If retirement is blocked by impassable terrain or enemy units, then an additional 2 hits are taken for every 4" they cannot retire.
Elimination
Units are eliminated upon the acquisition of more than 16 hits.
Commanders
Commanders must be attached to a mounted or foot Man at Arms unit, and remain attached throughout the game. If the unit is eliminated, then they are eliminated too. Units with an attached Commander are able to re-roll their activation and combat dice, but must accept the scone score.
The loss of a commander reduces all activation dice roll scores by 1.
Peter, great looking table and a fine scrap. Does the French army have much chance in this action? Duplicating the historical result is a good start and comforting validation of your rules, OB, and terrain.
ReplyDeleteI enjoy seeing you reaching back to the classics for inspiration. Is Thomas' OHW a classic yet? I think it is!
Thanks Jon. I recon if the French had another foot men at arms instead of a yeomen unit, then the battle would have gone the other way using these rules.
DeleteAs for is OHW a classic? It is for me given the number of times I refer to it, but is the passing of time one of the factors required to make something a classic?
Great blog
ReplyDeleteThanks
DeleteLooks like you nailed the historical action. This was a solo game I take it. Surprise victories usually need clever victory conditions do that the disadvantaged side can still win the game while losing the battle. 😀
ReplyDeleteYes, it was a solo game. The scenario seems well balanced and could have gone the other way. It is one I will play again.
DeleteA splendid report Peter and some interesting rules modifications too.
ReplyDeleteThank you. As a solo player I do enjoy rules with activation mechanisms.
DeleteAnother great report, Peter. Looks like a tight game - always the best. Also, very much like the activation system…is it one you’ve used before?
ReplyDeleteI am using this activation mechanism in the WW1 Palestine campaign games. I suspect I will use it more as I like the way friction increases as unit losses increase. It also encourages the use of reserves which remain effective later on in a game.
DeleteI've always wondered how good a game this scenario/action would make and now I know:). I really like his Ancient & Medieval Wargames Rules and like many of my plans, I should give them and extended run out once again.
ReplyDeleteI was originally unsure about the scenario, probably one of the reasons I had not yet played it, but it provided a most enjoyable game.
DeleteA fine looking battle, and I think the rules are especially suited to this era!
ReplyDeleteThank you. The rules seemed to work out well, a few more games need to be played to test them more thoroughly.
Delete