 |
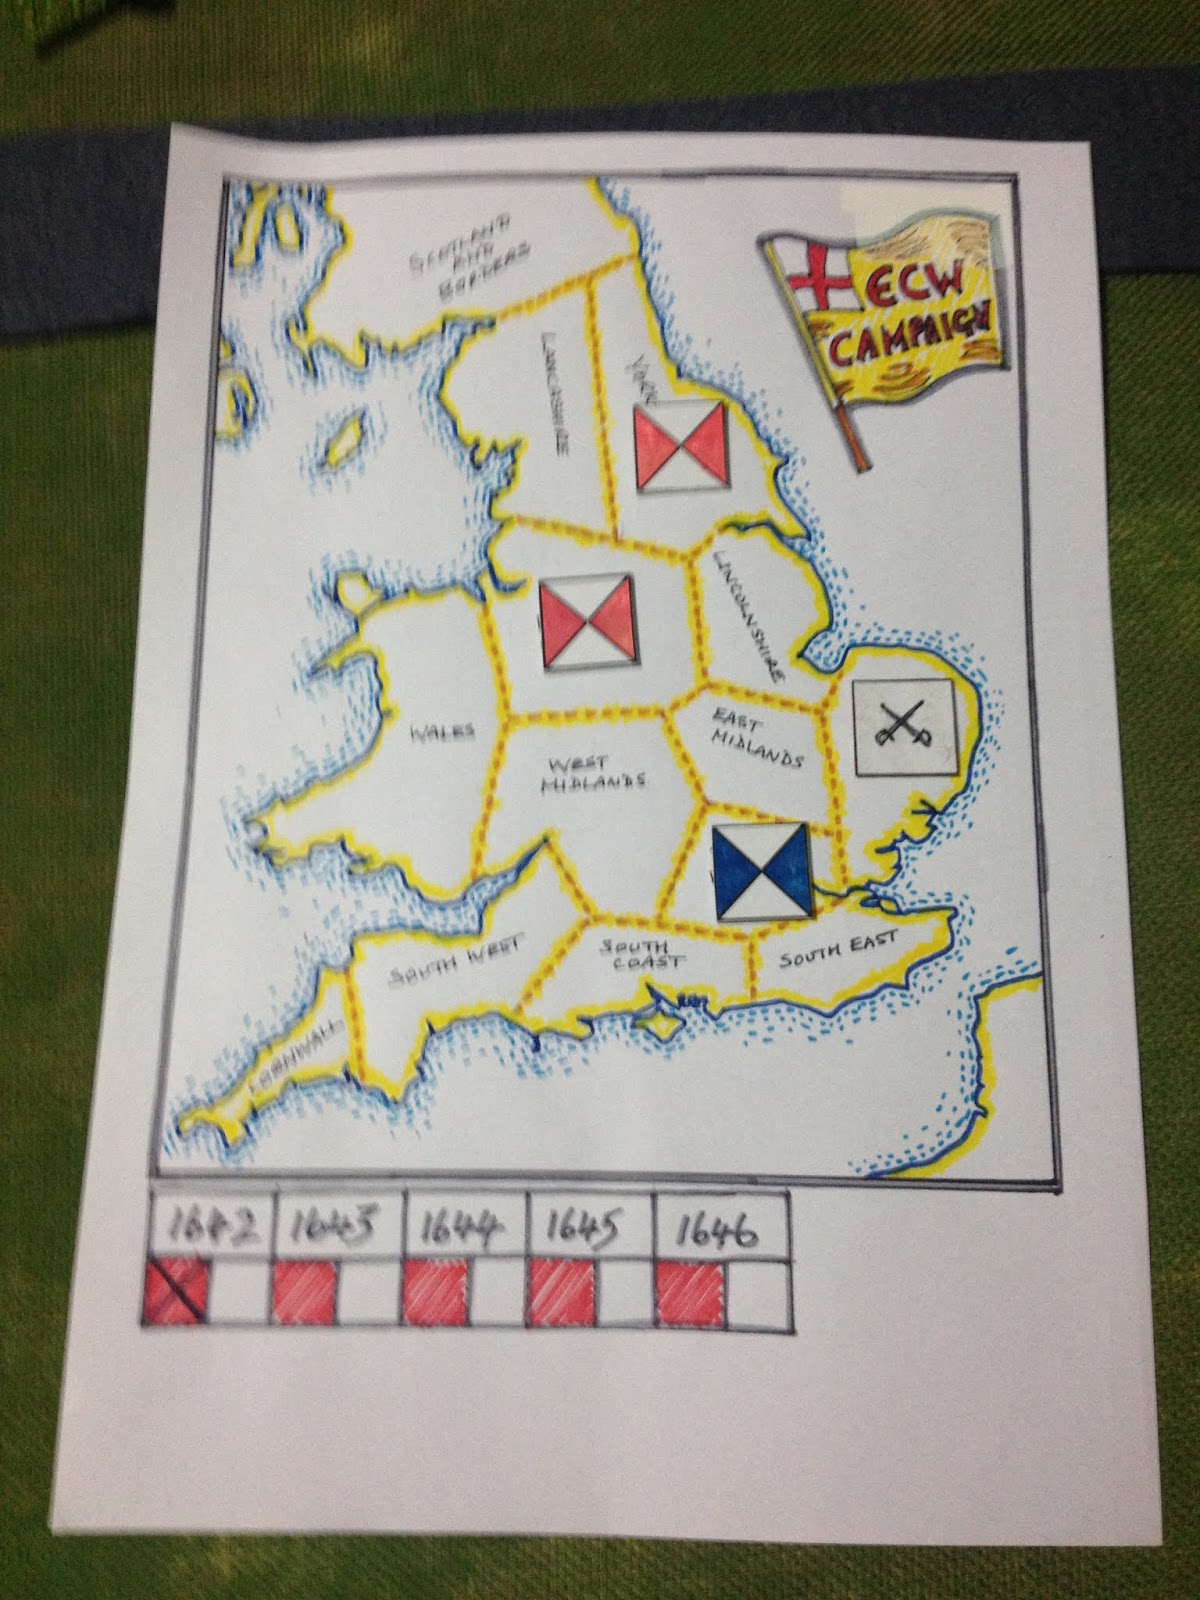
| Campaign map showing the battle in East Anglia |
Order of battle (OB)
Parliamentarian units
5 x Foot (mixed pike and musket)
5 x Horse (Trotters)
2 x Dragoon
1 x Commanded Shot
2 x Artillery
Royalist units
4 x Foot (mixed pike and musket)
5 x Horse (Gallopers)
1 x Commended Shot
1 x Dragoon
Parliamentarian forces had recruited well in East Anglia and had 15 units vs. Royalist 11 units. This can be read as their dice rolling for determining their OB had been so lucky, every roll a 3 on a D3. They did not even need to use their re-roll option for controlling the nearby region of Themes Valley.
 |
| Parliamentarian forces arrive |
 |
| Royalist defensive positions |
By mid-afternoon Royalist forces defending the western bridge requested assistance and the Royalist cavalry reserve were ordered across to provide support. The contest for the eastern bridge was not going well for Parliamentarian forces with their artillery support proving totally ineffective. It was a different story at the western bridge where most Royalist units were routed and the bridge was defended tenuously by a unit of commanded shot. A unit of Parliament foot successfully crossed the bridge and were able to see off a charge by the reserve cavalry.
The assault on the eastern bridge was becoming quite a struggle with losses on both sides rising. When news of the other bridge being lost arrived late in the afternoon, the Royalist commander ceded the battlefield to the Parliament forces.
A Parliamentarian victory, honours are even in the campaign.
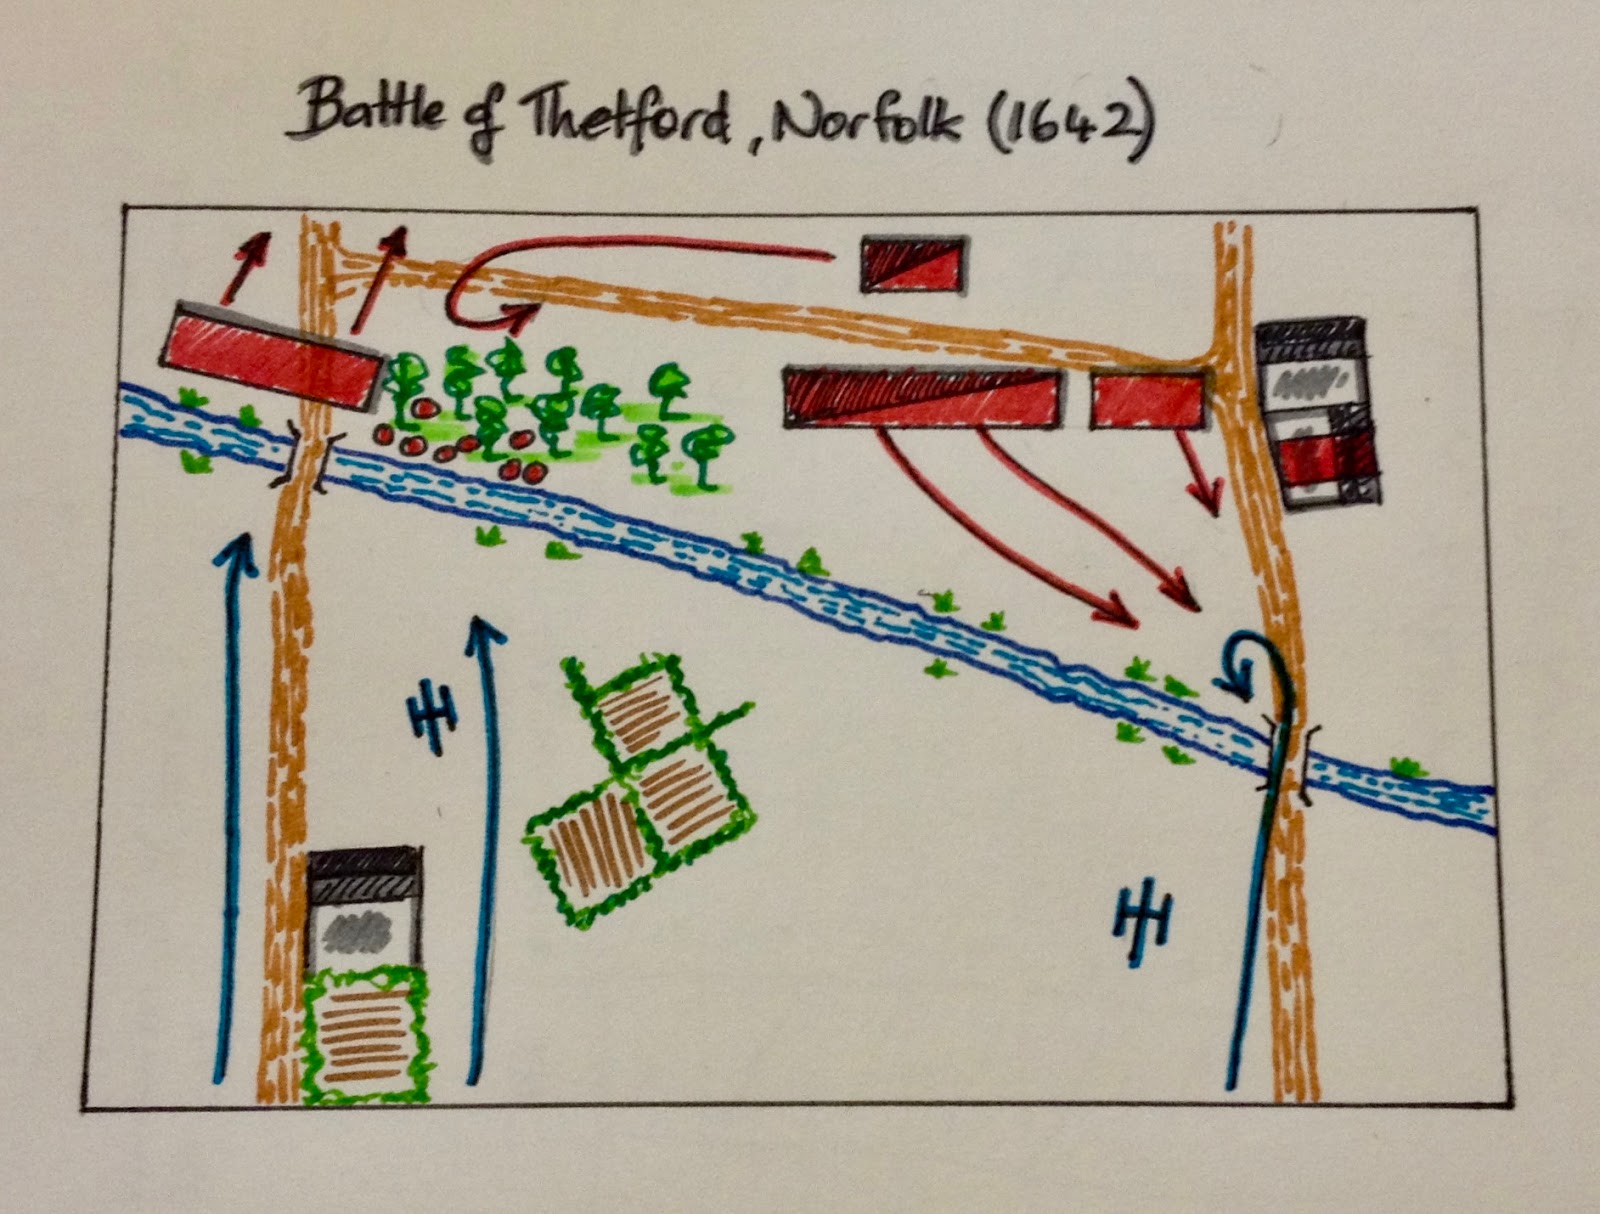 |
| Flow of the game |
 |
| Assault on the eastern bridge |
 |
| Assault on the western bridge |
 |
| Royalist cavalry charge all who cross the bridge |
 |
| The commanded shot defend from the woods while cavalry reserves arrive |
 |
| The heavily contested eastern bridge |
 |
| The western bridge is crossed and the cavalry change failed to dislodge the foot unit. |
 |
| Final stand off at the eastern bridge |
A wonderful looking game Peter and a great campaign underway.
ReplyDeleteThank you. It will be interesting to see how the games progress. The rules seem pretty set now, so I should write up my notes and post them.
DeleteGreat looking game -table is well done. I love you maps!
ReplyDeleteThank you. The maps started because my phone was a bit flat and I did not have many photos for a post.
DeleteI am in complete envy of your skill with pens and paper. Your maps keep getting better and better. Great looking game. Being outnumbered, could the Royalists have expected to win this fight?
ReplyDeleteI am quite enjoying drawing the maps and they sum up the games quite effectively. I expect most regions next to go with the side with the most controlled areas. As we progress with 1642 selecting the region to control will need consideration.
Delete