An English Civil War game report for this weekend's post. The game setup is loosely based upon the scenario "The Battle of Fiddler's Bottom" from Charles Grant's book "Wargame Tactics". Regular readers may remember a few weeks back I was messing around with the D3 ECW rules looking at the activation of units and order of activation by troop type. In the end I found two types of activation seemed a bit too much after playing the game. After reading the posted comments and ideas (thank you to those people) and a bit more reading I have opted for one activation approach based upon organisation of an ECW army into commands (eg centre, flanks, reserve, etc.)
 |
| The tabletop all prepared, armies organised and deployed. |
The activation mechanism on along with deployment approach was influenced by the book “With Pike and Musket” by C.F.Wesencraft, and in particular one paragraph where an English Civil War battle is rather nicely summarised.
“In battle, the infantry usually were formed in the centre, opposite the enemy infantry, the cavalry forming the two wings. The guns were run out in front of the infantry. Thus four distinct actions were fought. First, the guns bombarded each other, then the two wings would clash, and finally the infantry met. Often each action was unaided by any other supporting one, even victorious troops often preferring to chase their own particular foe from the field instead of going to the assistance of another section.”
With that in mind, there are a couple of pre-battle steps:
- Organise the forces into commands
- Deployment of the commands
Organising Armies into Commands
The units available to Parliament and Royalists are selected:
- Parliament: 5 Foot units, 1 Dragoon unit, 1 Artillery unit, 1 Commanded Shot unit, and 6 Horse units
- Royalist: 4 Foot units, 2 Dragoon unit, 1 Artillery unit, 1 Commanded Shot unit, and 6 Horse units
These selected units need to be organised into command groups which represent part of the army organisation on the battlefield. Commands group together one or more units which must be in most cases the same unit type (the exception being independent units, such as: artillery, commanded shot and dragoon units.
There are a maximum of five commands, but not all need to be used by a player:
- Centre - can only be made up of Foot units.
- Right Flank - can be made up of either all Foot or all Horse units.
- Left Flank - can be made up of either all Foot or all Horse units.
- Reserve - can be made up of either all Foot or all Horse units.
- Independent Units - are any Dragoon and Artillery units and is the only command these units can belong to.
Where there are multiple units in a command a unit must always remain within 6” of at least one unit from that command. This rule forces a command to operate as a block of units. This rule does not apply to independent units who do not need to remain in contact with other units within the command.
All commands get the opportunity to be activated once during a game turn, and all units within a command can move, shoot, or melee when their command is activated. More about the sequence of play used later.
The Royalists organised themselves so:
- Centre Command - 4 Foot units.
- Right Flank Command - 1 Horse unit.
- Left Flank Command - 4 Horse units.
- Reserve Command - 1 Horse unit.
- Independent Units - 2 Dragoon, 1 Artillery and 1 Commanded Shot units.
 |
| Royalist Centre Command |
 |
| Royalist Independent Units |
 |
| Royalist Left Flank, Right Flank, and Reserve Commands |
The Parliament organisation decided upon was:
- Centre Command - 5 Foot units.
- Right Flank Command - 4 Horse units.
- Left Flank Command - not used.
- Reserve Command - 2 Horse units.
- Independent Units - 1 Dragoon, 1 Artillery and 1 Commanded Shot units.
 |
| Parliament's Centre Command |
 |
| Parliament's Right Flank and Reserve Command |
 |
| Parliament's independent units |
I made up a card for each command as the cards will get used during the game. They help with determining the sequence of events. Set aside any command card which is not used.
Deployment of the Armies
Deploying the armies on the tabletop takes an step by step approach which is intended to constrain what the players can do with their commands and independent units:
- Players roll a D6 (re-rolling ties), the highest scoring player deploying first in all the steps.
- Deploy all centre command units (if there is a centre command).
- Deploy all right flank command units to the right of the centre if there is one.
- Deploy all left flank command units to the left of the centre or left of the right flank if there is no centre command.
- Deploy all reserve command units behind any of the deployed commands (remember to leave room when deploying the other commands).
- Deploy all independent units. Artillery are deployed either in front of the centre or on hills for artillery. Dragoons and Commanded Shot can be deployed in front of the flanks or beside a flank unit.
- Deploy Commanders, preferably in a safe position.
Here are the commands getting deployed for the game. Parliament won the dice-off and will start in each deployment step.
 |
| The centre commands are deployed first. |
 |
| The right flank commands are next to deploy. |
 |
| The left flank commands are deployed. Parliament does not have a left flank command so passes for this deployment step. |
 |
| Reserve commands are deployed, they must be positioned behind the other commands. |
 |
| Independent units are deployed and do not have to adhere to being within 6" of another unit. |
 |
Other independent units are deployed around the table. Artillery in front of the centre command, and dragoons and commanded shot either in front or beside the flanks.
Note - I forgot to take a photograph of the deployed commanders. |
Sequence of Play
The armies are now all deployed and ready to begin the battle.
 |
| Ready for battle |
At the start of each game turn each player takes their command cards and places them in the order they want their commands to be activated. Only the player knows the order, so place the cards face down with the first command to be activated on top.
Then both players roll a D6 with the highest scoring player activating their command first (re-rolling any ties). Players then alternate activating their commands in the order of their command card decks by taking the top card from their deck of command cards.
 |
| Constructing a command card deck. In this case the order of activation is: 1) independent units, 2) right flank, 3) left flank, 4) centre, and 5) reserve. The cards remain unknown from the other player are placed face down to be drawn one at a time. |
When a player’s command is activated all units in the command can: move, shoot, and melee. Once both players have activated all their commands, start the sequence again with players ordering their command cards and dicing to see which player activates first.
This approach of a player having commands activated is trying to reflect the difficulty of commanders trying to coordinate the various parts of an ECW army.
If playing a solo game, try just shuffling the opposing army’s command cards and always give them the initiative. This is the approach I took with the game below.
And Finally the Battle Report...
 |
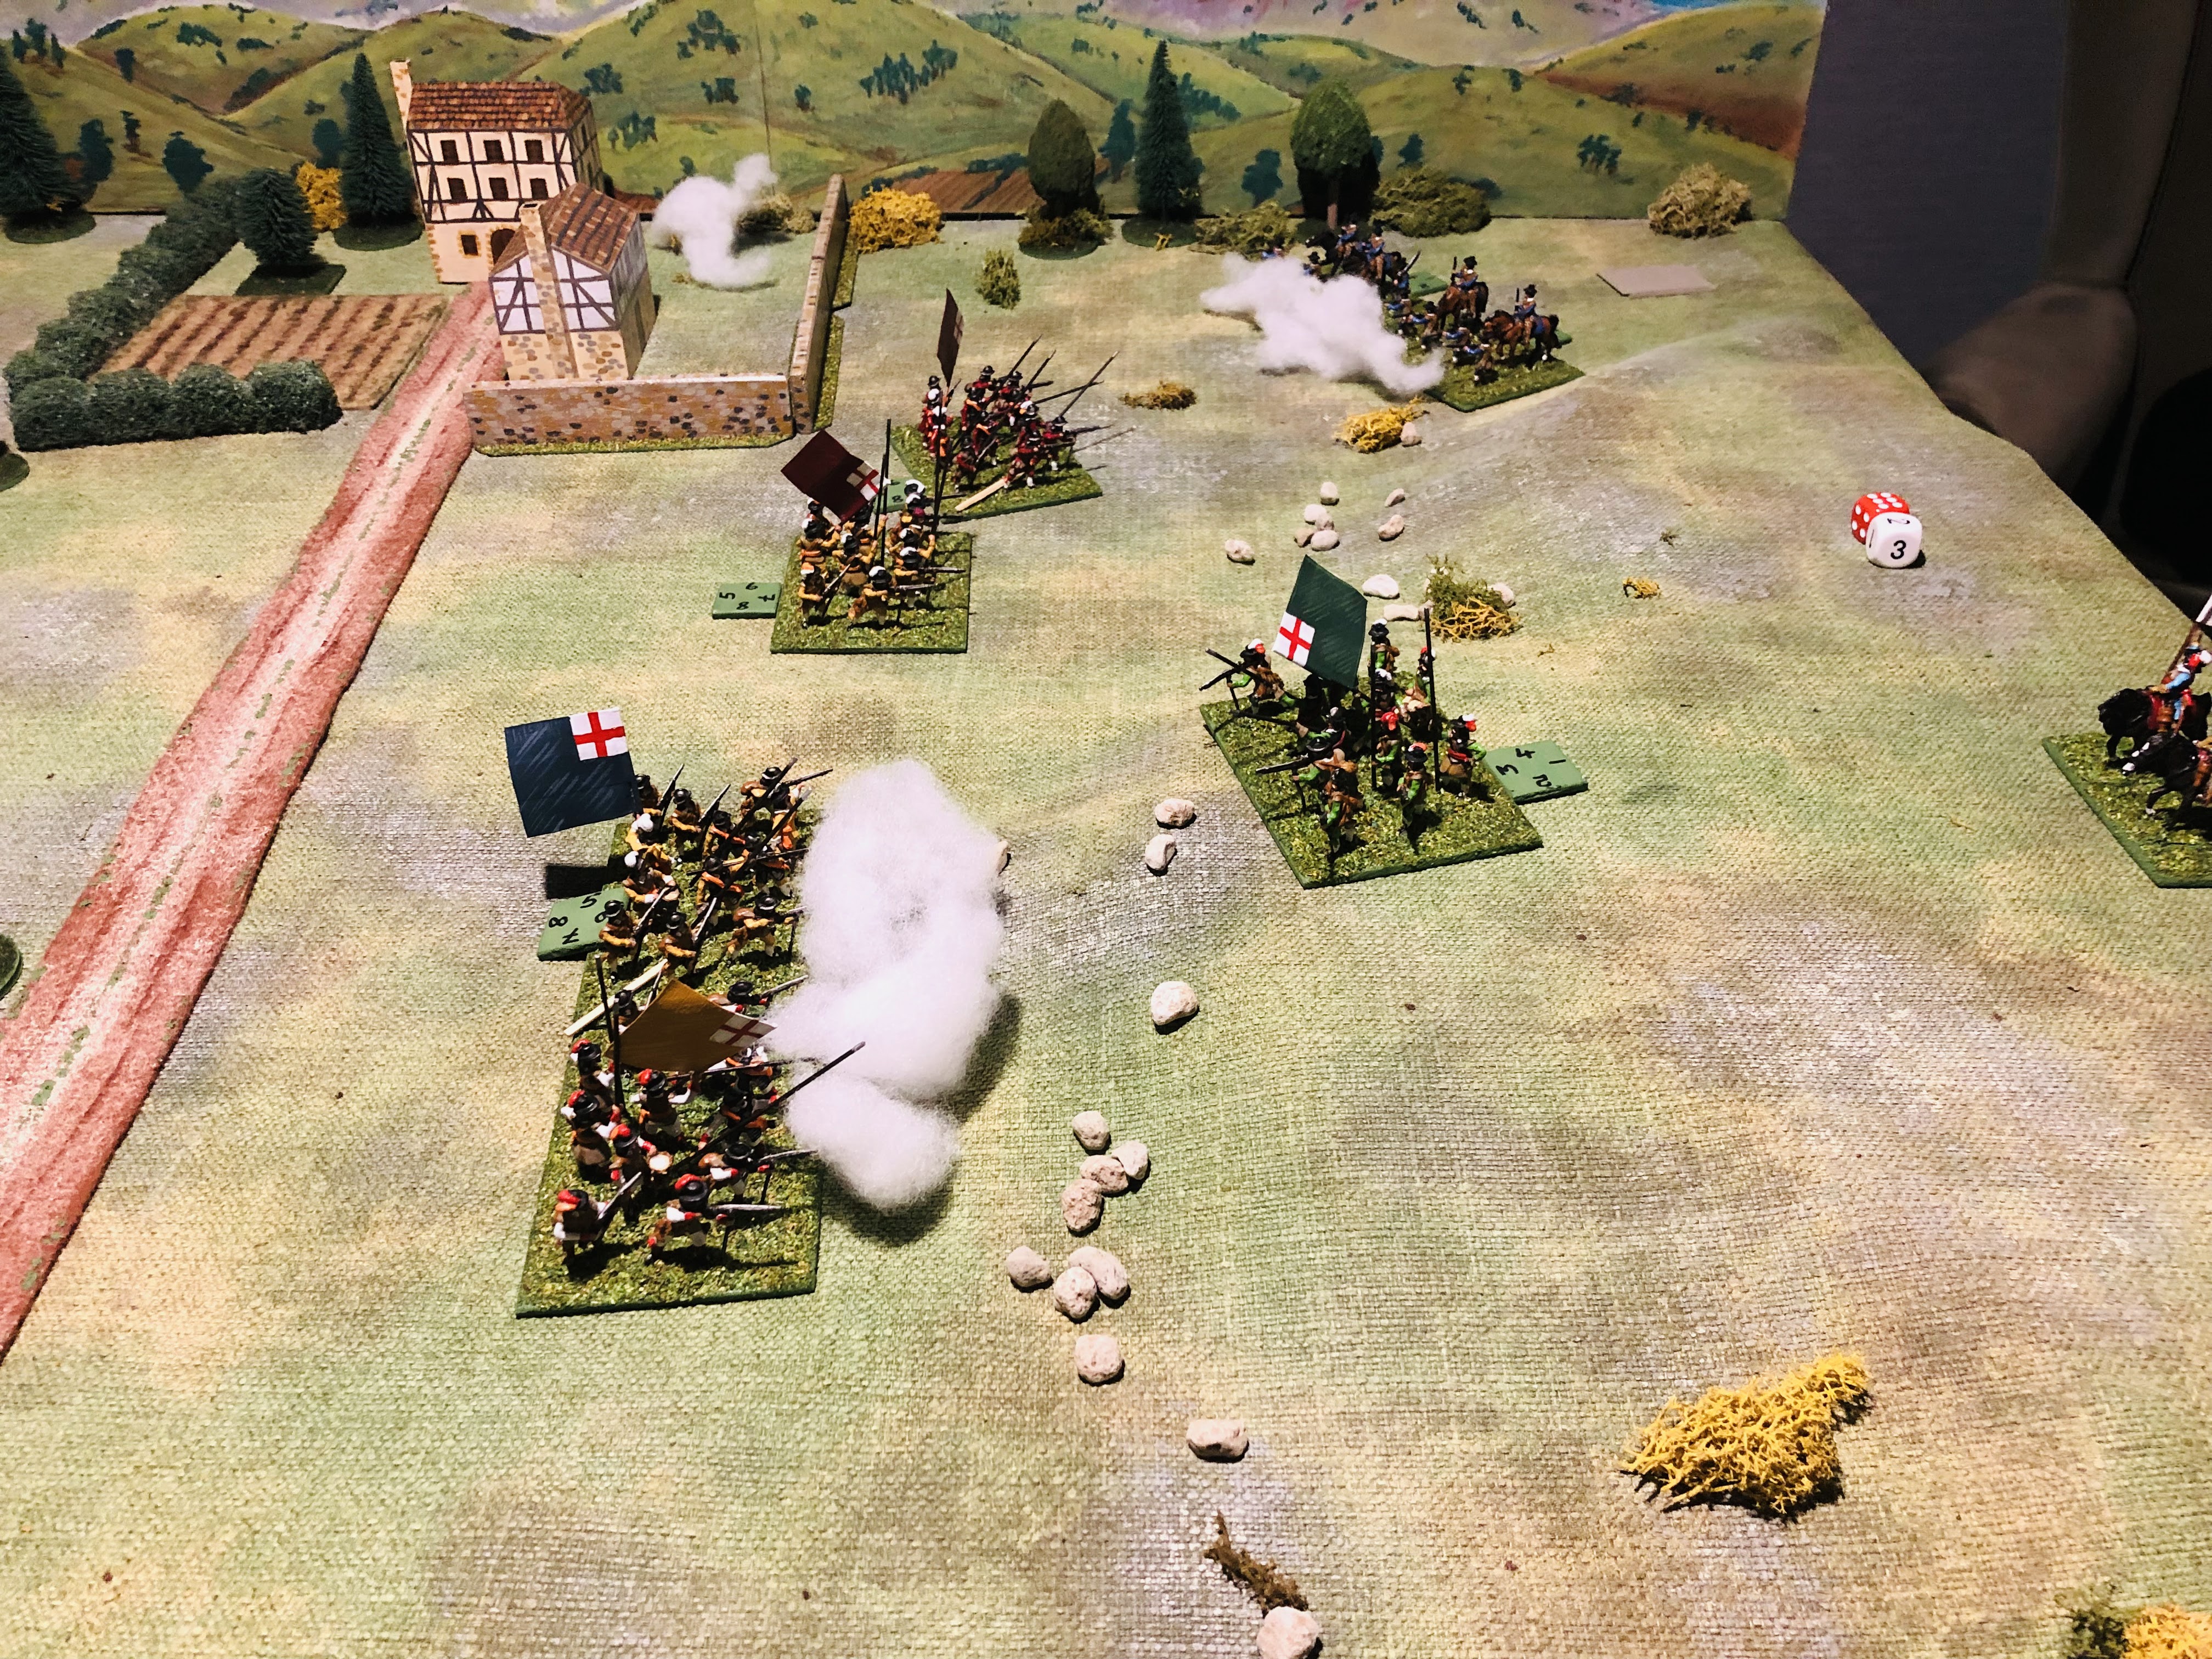
| The Horse on the nearest flank move forward to engage around the woods. Meanwhile independent units engage. |
 |
| The Horse engage and Parliament's centre advance after their artillery run out of ammunition and retire. They also shoot at the Royalist right flank Horse which had advanced. |
 |
| The reserve Horse from both sides clash (just seen behind the wood) and Parliaments centre continues to advance. |
 |
| The Royalist commander's view |
 |
| The Royalist Horse are gaining the upper hand, but are impetuous and charge off after each routed Parliamentarian Horse unit. |
 |
| The Royalist centre are holding the hilltop, but are under pressure. meanwhile the Royalist Horse (the near flank) definitely have the upper hand. |
 |
| Dire straights in the centre for Royalists. |
 |
| The Royalist Horse are blocked by Parliament's reserve Horse who had fallen back as a precaution. They fail to stop the charging Royalist Horse who charge off after them rather than attacking Parliament's commander (Doh!) |
 |
| Time for the Royalist's to cede the field. A victory to Parliament! |
Having played a few games using this activation and deployment approach I am finding they are giving me the type of ECW I am expecting. Having to plan and organise your command groups before the battle, deploying them in an ordered fashion, and activating units in blocks with their command.
I have updated the rules (found at the top of the blog or
here) and included a couple of deployment examples, including a Horse heavy army with minimal Foot units.


Excellent post, some nice ideas have gone into your system. Your collecting of some of the classic wargaming books is feeding nicely back onto the tabletop.
ReplyDeleteThanks Norm. Both books are a joy to read and With Pike and Musket being particularly useful.
DeletePeter, your activation method is really clever. Having each player rank the order of each command's activation within a turn is a simple yet effective method in forcing a player to stick to a plan regardless of what is seen unfolding for the turn. Only on the following turn can a player truly react to what is seen on the ground.
ReplyDeleteI am interested in reading your thoughts and experience with what this change has introduced in your games. Why is it useful to place this constraint and rigidity into the turn sequence?
I am going to give this some more thought and study.
In the game there were two instances that spring to mind where the rules definitely constrained my actions. The first was I would normally split off a unit from Parliament's centre to chase off the pesky dragoons, but could not and retain command coherence (being within 6 inches of another unit). The second instance was with Parliament's reserve horse, who after defeating their opposite number could not skip around the side of the Royalist centre because of the rule to advance towards or away from enemy units within 12 inches.
DeleteThere is more to you question which I will post about.
Great, well thought out stuff as ever. I keep tinkering with mine but don't get to play them much - these ideas are manna from heaven.
ReplyDeleteThank you. I hope you get your ECW collection onto the tabletop soon.
DeleteWesencraft's book is an absolute classic and one that I'm glad to have in my library. The game looks great BTW.
ReplyDeleteThe book is an absolute ECW wargaming gem.
DeleteInteresting stuff, and a lot of food for thought. I think we're too used to games with an easy and flexible chain of command, where orders are issued and obeyed almost instantly without fail.
ReplyDeleteThe ordering of command cards which are alternatively played creates friction without stopping units from activating, just their order. It is also gives a "clunky" feel to the game which I hope reflects the unprofessional nature of the opposing forces.
DeleteHi Peter, a great looking game. The activation system is elegant. Simple and effective way of adding some friction to the command process.
ReplyDeleteThanks. The activation approach has given me the type of ECW games I am looking for so far in the games I have played.
DeleteNice overview of the mechanics and play report. I do like the idea of the command deck. What’s more important is that you like it and knowing when to stop tinkering with an idea. 😀
ReplyDeleteKnowing when to stop tinkering can sometimes be a challenge, especially when returning to rules after a break playing other periods or games.
DeleteExcellent report, and sounds like a great deployment and activation system, very much suited to solo…going to have to give it a go, possibly combined with Alan Saunders’ ECW version of Portable Wargame. Many thanks for the clear and inspirational post!
ReplyDeleteGlad you found the post useful.
DeleteThanks for publishing this battle report and revision of your D3 rules. I must agree with the comments about it posted above and look forward to using your system in my own ECW games and, perhaps, in other periods too.
ReplyDeleteThank you kindly. You mention apply them to other periods, the War of the Spanish Succession springs to mind for me.
Delete