 |
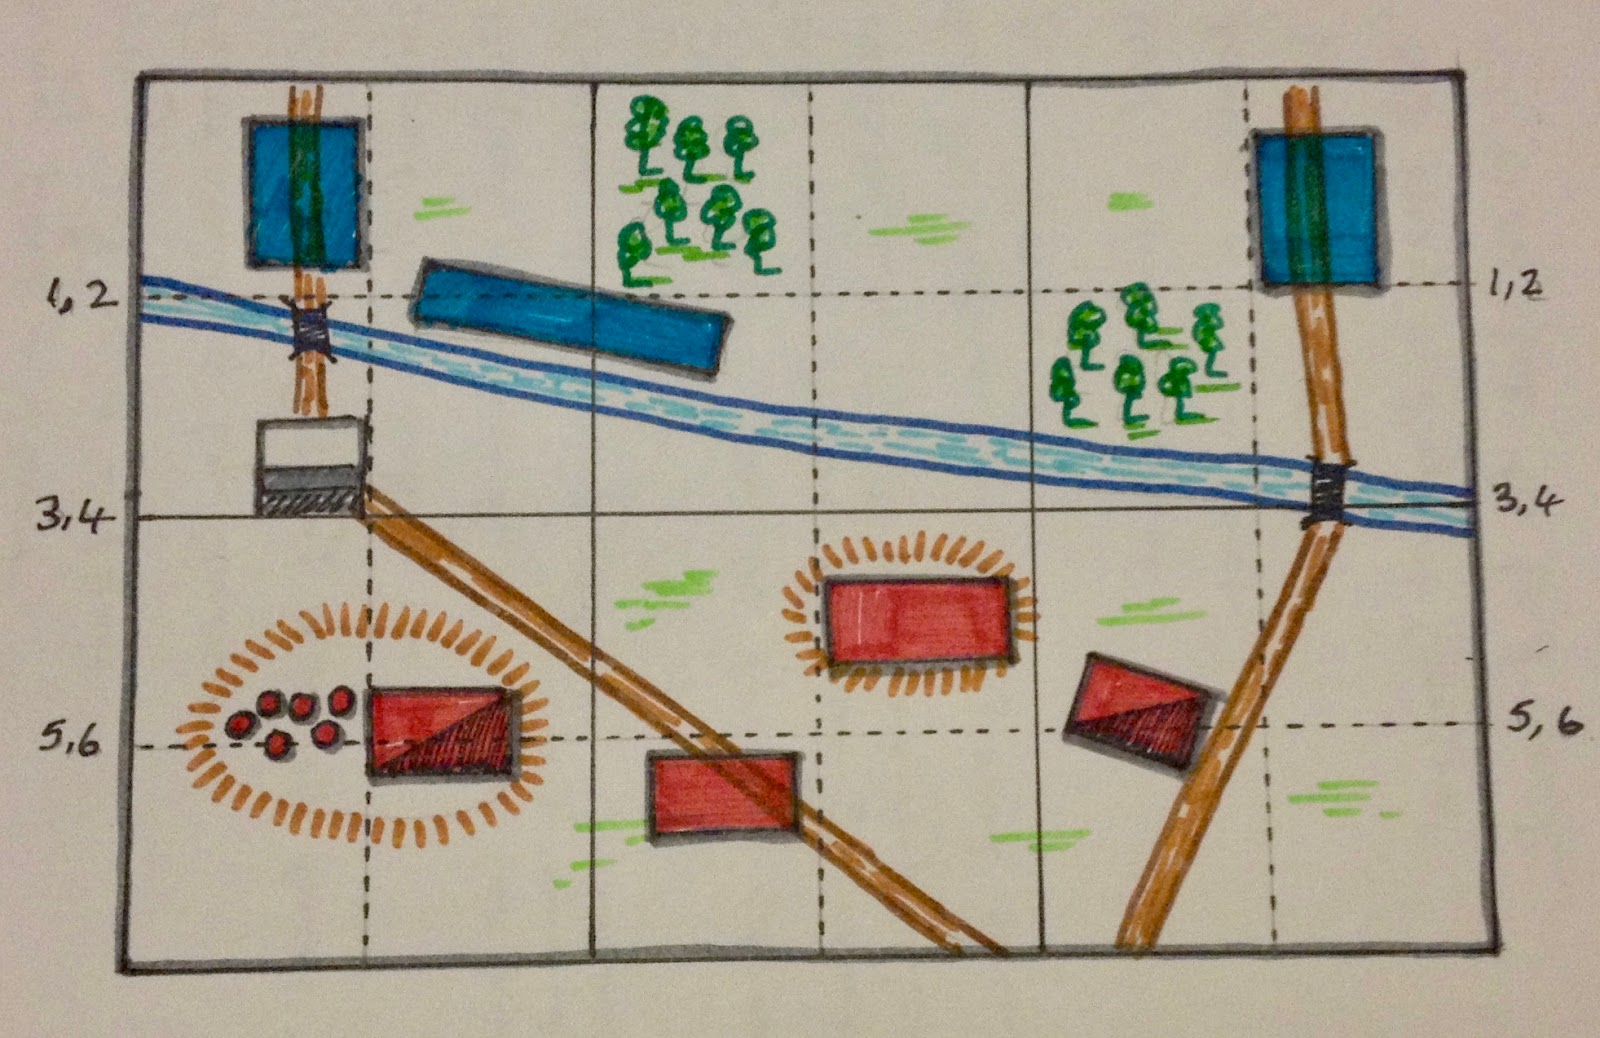
| Initial positions |
 |
| The tabletop view of the opening positions. A Parliamentarian cavalry column on the near road and a mixed cavalry and infantry column moves towards the town. |
 |
| Royalist cavalry charged any Parliamentarian cavalry that moved across the bridge. Creating a stalemate situation on this flank. |
 |
| Infantry quickly occupied Dunington town, while in the centre artillery from both sides exchanged shots. |
 |
| As soon as the infantry took position outside of the town Royalist cavalry charged while being supported by their infantry reserve which had moved up Dunington road and exchanged musket fire. |
 |
| Soon Parliamentarian cavalry were able to move up through the town. |
 |
| Dragoons ford the river (taking 1 hit in the process) to help try and break the stalemate |
 |
| Royalist cavalry supported by infantry put up a strong showing on their left flank and were able to rout the attacking units. |
 |
| Movements and attacks during the game |
 |
| Current campaign map and areas of control |
I really enjoy your maps and artwork as well. Adds superbly to the atmosphere.
ReplyDeleteThank you. They are fun to do and don't take too long to create. Especially now that I have got into the swing of drawing them.
DeleteAs Aaron says (and I repeatedly!), your battle maps are terrific and add greatly to following the action on the table. I am very surprised that the Parly's deployed along the river bank did not cross over to form a bridgehead and provide support to the column moving across the bridge.
ReplyDeleteBrilliant victory for the King!
Yep, that was a mistake partly due to the limit on how many units a side can activate based upon how many units a commander can observe within 24 inches. The Parliamentarian commander stayed with their centre and lost contact with his flank units.
Delete